
Grade Level
6 - 8
minutes
45 to 90 minutes
subject
Environmental Science, Engineering and Tech
stem practices
Asking Questions and Defining Problems, Developing and Using Models
Activity Type:
Engineering design challenge, climate change, STEAM, Family activity, After School Activity
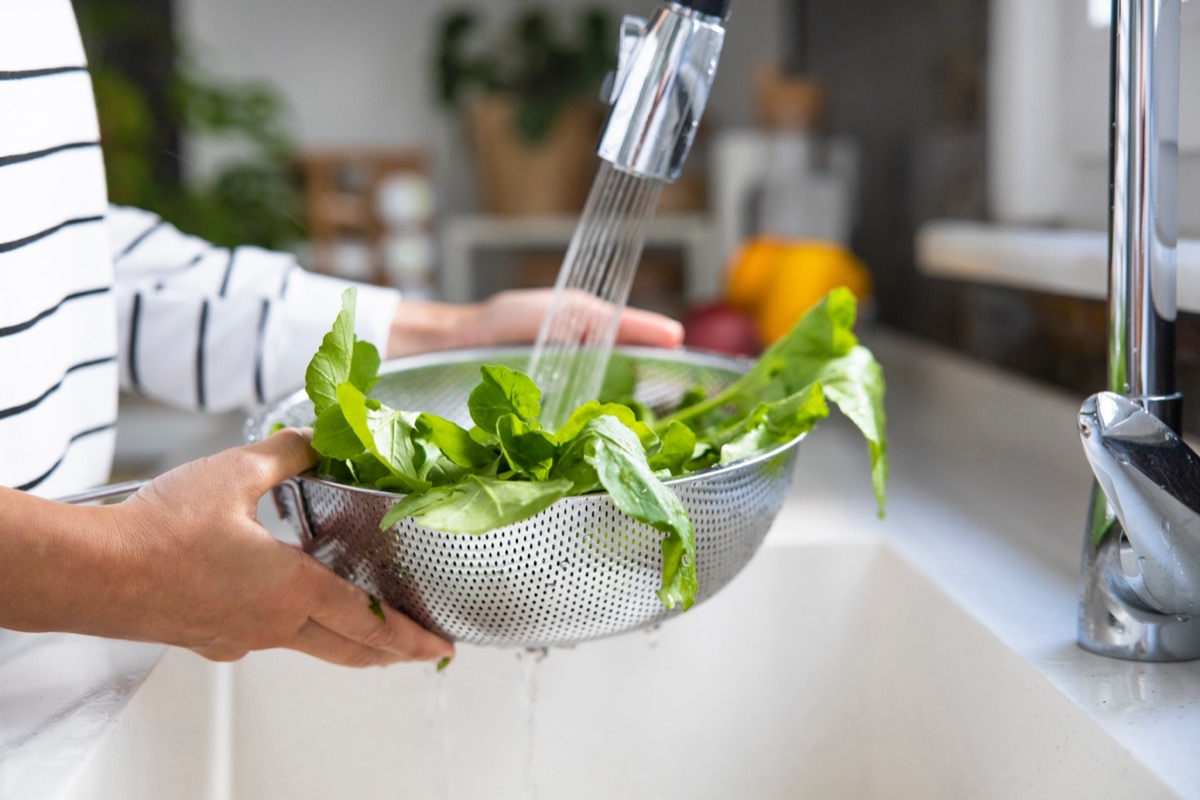
Have you ever rinsed a bunch of grapes or a head of lettuce in a colander? Turn on the faucet, let the water pour over the fruit or veggies, and watch the water come out of the little holes in the bottom—hopefully, carrying away any dirt or bugs still clinging to the food as it goes. It’s a good way to make sure your food is clean and healthy.
Now, imagine there’s a limited amount of water for you to use each day. Is there a way to save that rinse water to use again? How would you catch the water before it hits the drain? And how would you clean that water so it’s safe enough for drinking or washing?
That’s the problem engineers face on the International Space Station (ISS). As it orbits the Earth, the ISS must provide all the air, food, and water its crew needs for days, weeks, and months at a time. But the station is only about the size of a six-bedroom house, with an average of seven people living there at one time, so efficiency is key. Instead of using necessities like water only once, the ISS now recycles water again and again…and again.
Down To Earth: Space Science For Community Change
Catching Droplets To Use Again
On the ISS, water behaves differently than you might expect. The ISS experiences microgravity, where objects are almost weightless. The low gravity means water tends to form itself into completely round droplets—and the droplets don’t automatically fall downward, like drops of water do when you turn on a faucet on Earth. If an astronaut isn’t careful, the little spheres of water can escape and float around the station! How does the ISS Water Recovery System compensate for microgravity? Hint: Watch the video tour below of the water system by Canadian Space Agency Astronaut Chris Hadfield. See if you can catch the ISS solution to the problem!
On the ISS, the water cleaning system uses centripetal force by rotating the water to help pull it along. Spinning water filters are sometimes used on Earth to create a whirlpool effect that pulls dirt and debris down and pushes the remaining water back up along a different route, separating the two.
Want to try the filtering effect of centripetal force for yourself? Run some damp lettuce leaves or other wet plant material through a salad spinner and watch it separate the water from the produce. Or, if you don’t have a salad spinner on hand, put some wet leaves in a plastic bag, close the top, and give the bag a few good twirls. When you open it up, the leaves should be almost dry, and water should be collected at the bottom of the bag. How much water did you collect?
Spinning lettuce greens gives you a small taste of the work engineers do to make life for the astronauts aboard the space station as safe and comfortable as possible.
Purifying Drinking Water On Earth
The enclosed environment of a space station isn’t the only place where clean water is in short supply. Here on Earth, many people live in areas where climate change is making it harder to find water that is safe for drinking, cooking, and growing food.
This growing water stress (the difference between the amount of clean water available and the number of people who need to use it) can affect the health of entire communities, but it’s especially harmful to children. That’s why many places are turning to the same solution used on the space station—water filters that can remove dangerous particles, chemicals, and microbes and make dirty water safe to drink.
How This Chemist Is Turning Agricultural Waste Into Water Filters
Design And Test A Water Filter
Now it’s time for you to think like an engineer. In this activity, you’ll make a water filter using ordinary household items. The kind you will build is called a media filter because it uses one or more types of filtering materials. (The word “media,” which is the plural of “medium,” is used here to mean “materials.”) You will test each type of medium separately and keep track of how well each type works. Then, you can use what you observe to design a more efficient version.
Materials:
- The Mission Rehydrate data sheet and a pencil
- Dirty water (Use water from a puddle or pond, or try stirring in “contaminants” like soil, coffee grounds, or colored drink mix.)
- Tap water
- A pitcher or large jar
- A disposable spoon
- Several clear disposable cups or recycled jars
- Measuring cups
- Permanent marker
- Scissors
- One empty disposable water bottle per filter; discard caps
- A small piece of fabric to cover the spout, such as cotton gauze (used for first aid), cheesecloth (used for cooking), or any scrap of woven cloth
- Something to hold the cover on, like a rubber band, twist tie, or string
- Several kinds of media filter materials, such as:
– sand or small gravel
– dried grains like oatmeal, beans, lentils, rice, popcorn, ramen, or pasta
– fiber such as cotton balls or pads
– paper towels or coffee filters
– activated charcoal (sold with vitamins) - A clock, stopwatch, or timing app
- Optional: White paper or index card
- Optional: Measure Water Clarity With A Secchi Disk Handout
NOTE: Need more help regarding media filter materials? Check out the Mission Rehydrate Materials Guide.
CAUTION: Do not try to drink the water used in this experiment! Dispose of all your lab equipment when done.
Make Your Dirty Water
Mix up a pitcher or jar of dirty water, enough for several tests (1 to 2 quarts).
- Add 2 to 3 tablespoons of your chosen contaminants to clean water, then shake or stir. Keep adding your contaminants until the water looks cloudy. Record what contaminants you use and how much of the contaminants you use on your data sheet. Shake or stir your dirty water again before every test.
- Pour some dirty water into a disposable cup, label it as “dirty water,” and set it aside for later. You will use it later to compare how clean the filtered water looks after it has drained through the different types of media.
- Prepare a disposable measuring cup for your dirty water by writing measurements on a clear disposable cup with a permanent marker.
a. Pour ¼ cup of clean water into the disposable cup and mark the level.
b. Repeat with ½ and ¾ cup of water.
c. Label the cup as “measuring cup” and set it aside.
NOTE: Do not use a measuring cup from your kitchen to measure the dirty water. This experiment could contaminate it. - When you want to filter the dirty water, pour some into your disposable measuring cup.
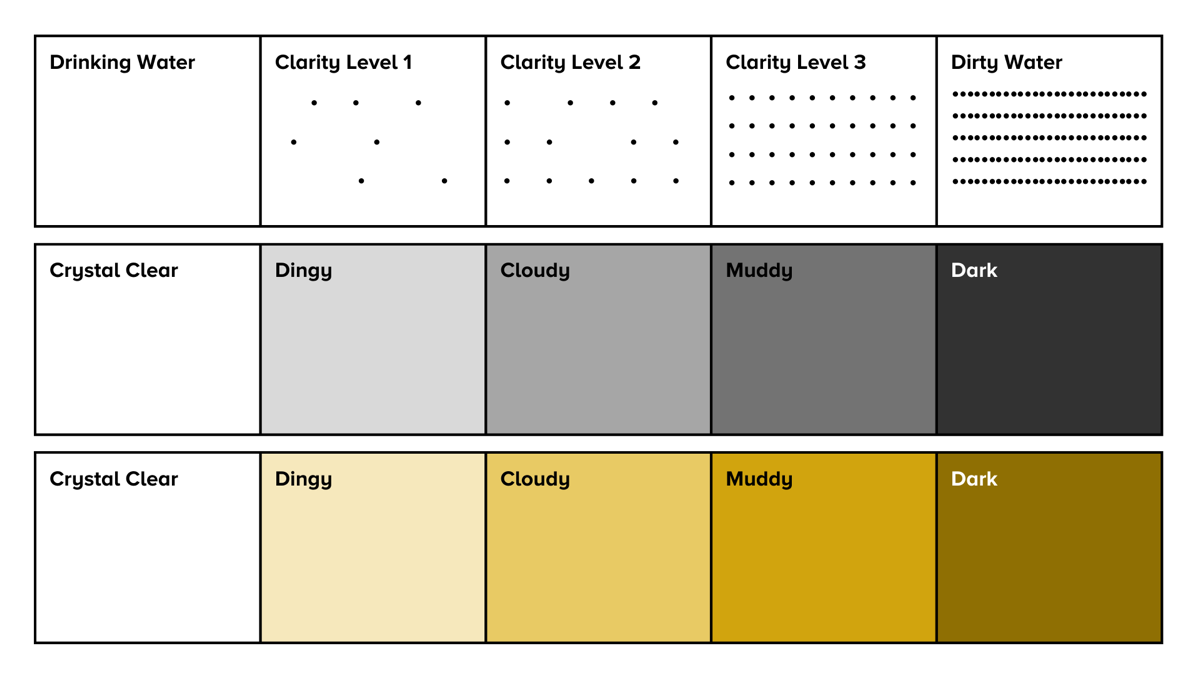
Create A Color Comparison Chart
Create a color comparison chart to rate the water’s clarity or turbidity after it is filtered through each material. Use clean drinking water as the clearest sample and the dirty water you are testing as the darkest. Color each reference point along the scale with graphic software, photos of the actual test water, or a pencil or colored pencils. Then, decide how to label each (e.g., using numbers or descriptions). Below are some examples of color comparison charts, showing possible labels and drawings to indicate how clear or dirty the water appears.
Visually impaired? Consider using an app like HydroColor.
Build Your Filter
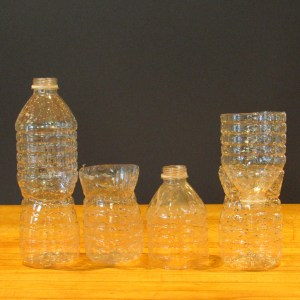
Collect your disposable water bottle, fabric, rubber band, and scissors.
- Cut the water bottle in half around the middle. You’ll use the top half like a funnel. The bottom half will hold the filtered water.
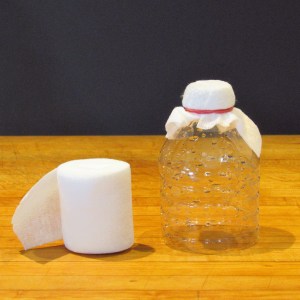
- Cover the mouth of the bottle (the spout) with gauze or other fabric. Hold it on tight with a rubber band or other closure.
- Turn the funnel you made with the spout facing down and rest it inside the bottom half of the bottle. Your filter is now ready to use!
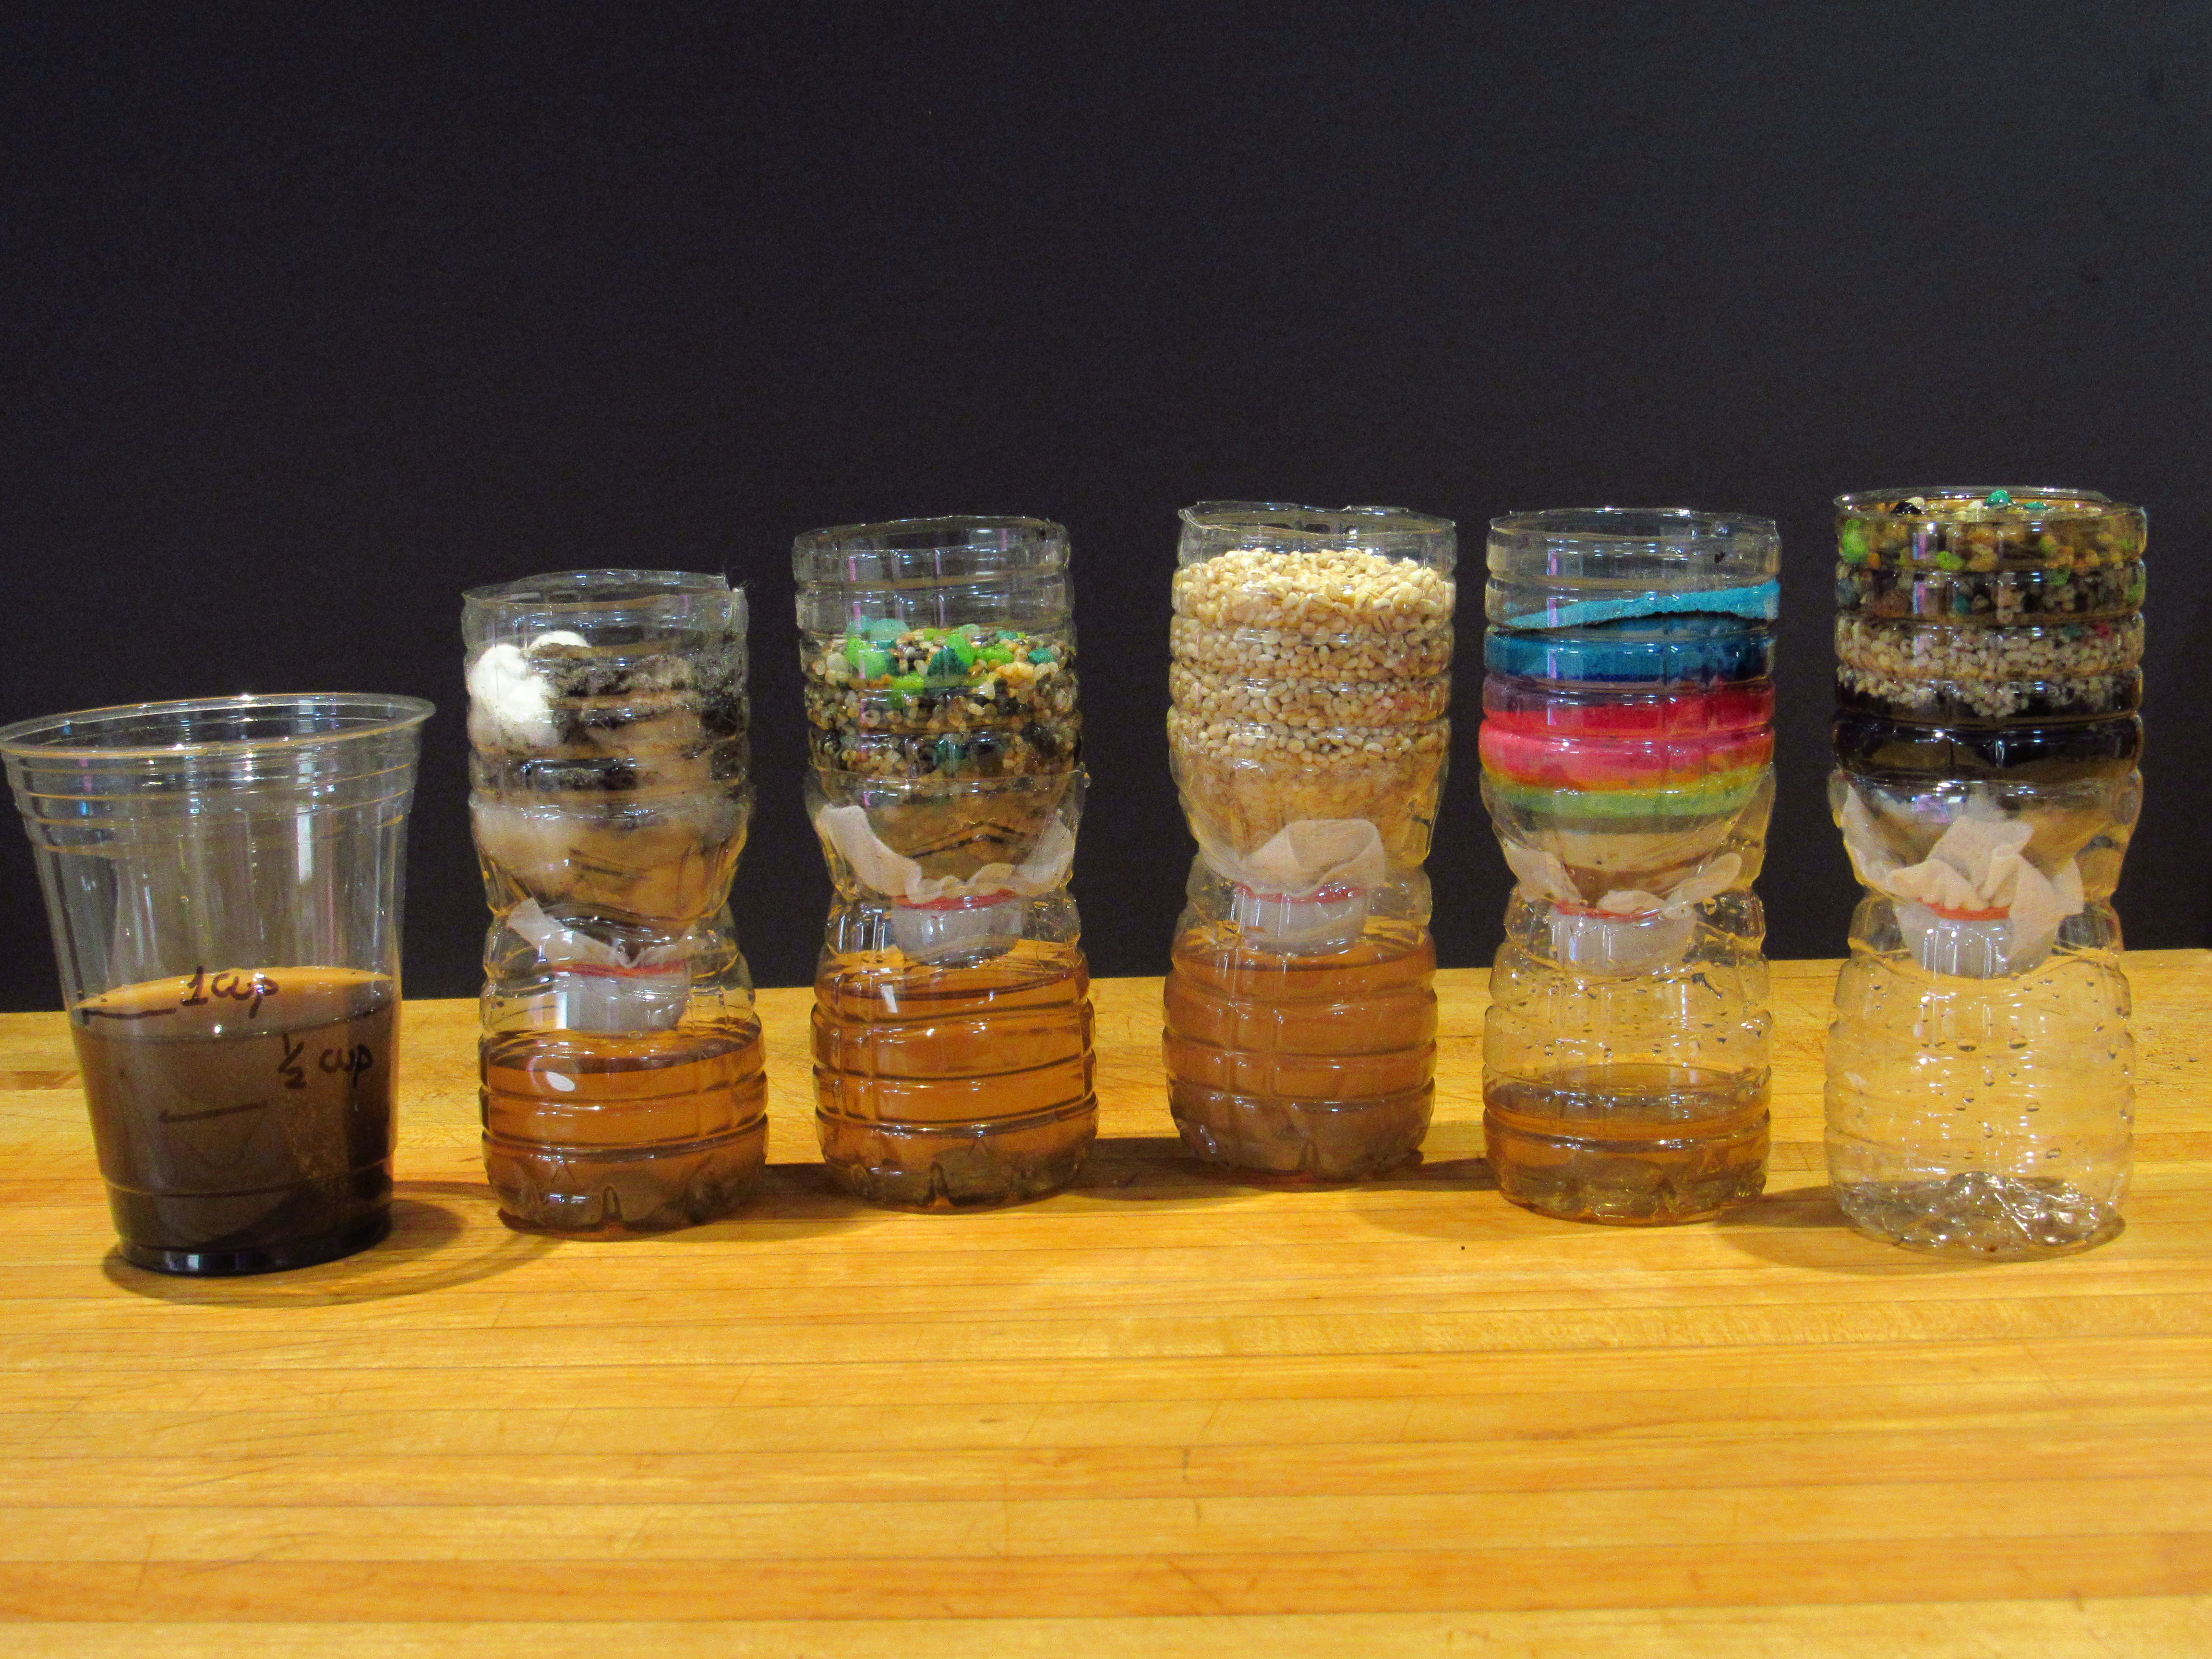
Test Your Filter
Now, you can start testing your filters and recording your data!
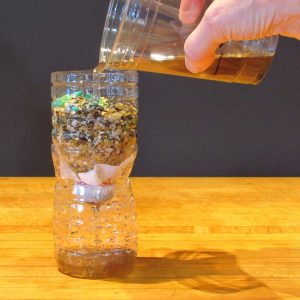
- Choose one type of filtering medium (sand, gravel, cotton, etc.) and put some in the funnel. The amount depends on the size of your funnel. Leave at least an inch of space at the top so that you have room to pour in the dirty water without overflowing the funnel.
- Using the disposable measuring cup you made, pour some dirty water into the funnel. The amount depends on how much water the bottom of your funnel can hold (keep the level of the filtered water in the bottom below the spout) and how much you can pour into the top of your funnel without overflowing. If the filter is draining slowly, only add a little dirty water at a time. Write the total amount of dirty water used on your data sheet. Return any leftover dirty water in your measuring cup to your pitcher or discard it.
- Once you have poured the water into the filter, use your clock, stopwatch, or timer app to record how long it takes for the water to start dripping out of the filter and how long it takes for most of the water to drain through. (Be aware that some filters may take less than a minute, and some may take several hours.) On your data sheet, record the time it takes for the water to pass through the filter.
- What do you notice about how dirty water moves through the filter material? Record your observations on your data sheet.
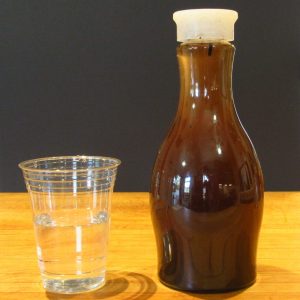
- After the water stops draining through the filter, pour the filtered water collected in the bottom of the filter into the disposable measuring cup. Record the amount of water that came through the filter.
- Pour the filtered water into its own clean cup and label it with the filtering medium you used. Compare it (by eye or with the HydroColor app) to the original clean water and your dirty water using the color comparison chart you made. Record the clarity on your data sheet.
- Repeat the process using a different kind of filter material. (If you are reusing your bottle, throw out the old filter material and rinse the bottle clean before adding the new filter material.)

Once you have tested all the media you want to test, it’s time to compare your samples and decide how effective each filter was.
As you review the results of your investigation, ask yourself how the various types of filtering material you observed worked to separate impurities from the water. What qualities might have made one kind of filtering material work better or worse than the others? For example:
- Do you think some filtering materials might work better with certain types of contaminants and not others? Why or why not?
- Which kinds of material filtered the water the fastest? Which was the slowest?
- Which filter material produced the clearest water?
Commercial water filters often contain several layers of different filtering material. Now that you’ve tested several materials, think about how you might combine them to make them work even better:
- How would the properties of the different materials work together to remove more contaminants from the water?
- Do you think the order of the filter layers would affect the results? Why or why not?
- Could you adjust the layers to make the filter work faster? If so, how?
If you have time, test out your ideas by running water that already went through one filter through a different filtering material, to see if it comes out cleaner. Or create a new filter with layers of different materials and test it with the dirty water.
3D-Printed Coffee Cups Help Liquids Defy Gravity
How Is Climate Change Affecting The World’s Water Supply?
What can be done about unsafe drinking water? According to the UN, water supply and climate change are closely linked in several ways:
- Higher temperatures mean less fresh water is being stored in the form of snow and ice.
- The increase in melting snow and ice also leads to rising sea levels, which drives salty ocean water upstream into rivers and groundwater that people use for drinking water.
- Meanwhile, heat and lack of rain are drying up sources of fresh water. As water levels drop, the remaining water can become dirtier and saltier.
- At the same time, floods from extreme weather like hurricanes can wash sewage and harmful chemicals into the water supply.
That’s why water filters are an important tool on Earth as well as on the ISS. When Flint, Michigan, tried to save money by switching its water source from Lake Huron to the Flint River, residents soon discovered dirty, contaminated water pouring out of their kitchen faucets. Among the chemicals found in Flint’s water was lead, a heavy metal that can affect brain development in kids. The water in the Flint River was polluted.
Activist Mari Copeny, also known as Little Miss Flint, was just 8 years old at the time, but she began collecting donations of bottled water to hand out to Flint residents. Now in her teens, she partners with the filter company Hydroviv to provide water filters to low-income communities around the country.

This isn’t old news! Experts predict climate change will cause more water emergencies in areas that were once considered safe from extreme weather. Now that you understand how water filters work, think about times or places when water filters may help people deal with water quality issues. Use what you have learned about water filters to sketch a design or create a model of a water filtration system that could help people facing water problems in your community. Start with the Environmental Protection Agency’s “How’s My Waterway” tool or find your local Consumer Confidence Report.
When you’ve planned your solution, share it! Post your filter prototype in the Down To Earth Community Lab so others can learn from your idea. Share a photo, and we’ll include it HERE for everyone to see!
Note: Ask your adult before sharing your prototype. Be sure to remove any identifying information.
Want To Learn More?
There are many fun ways to continue exploring water filtration and centripetal force. Check out these fun ideas!
- Explore more about how water behaves on the ISS, where the properties of water, like surface tension, are very different than on Earth. Even slime behaves very differently in space!
- Life support technologies designed for astronauts on the ISS contribute to sustainable development in Europe and Africa. Learn more about the connection between space research and water recycling!
- Similar principles of water filtration work naturally with groundwater in aquifers. Build your own groundwater model to investigate how contaminants move through the aquifer by conducting your own water testing.
NGSS Standards
- MS-ESS3-1: Construct a scientific explanation based on evidence for how the uneven distributions of Earth’s mineral, energy, and groundwater resources are the result of past and current geoscience processes.
- MS-ESS3-3: Earth and Human Activity – Apply scientific principles to design a method for monitoring and minimizing a human impact on the environment.
- MS-PS2-4: Motion and Stability: Forces and Interactions – Construct and present arguments using evidence to support the claim that gravitational interactions are attractive and depend on the masses of interacting objects.
- MS-ETS1-1: Engineering Design – Define the criteria and constraints of a design problem with sufficient precision to ensure a successful solution, taking into account relevant scientific principles and potential impacts on people and the natural environment that may limit possible solutions.
- MS-ETS1-2: Engineering Design – Evaluate competing design solutions using a systematic process to determine how well they meet the criteria and constraints of the problem.
- MS-ETS1-3: Engineering Design – Analyze data from tests to determine similarities and differences among several design solutions to identify the best characteristics of each that can be combined into a new solution to better meet the criteria for success.
- MS-ETS1-4: Engineering Design – Develop a model to generate data for iterative testing and modification of a proposed object, tool, or process such that an optimal design can be achieved.
Career and Technical Education Career Clusters
- Agriculture, Food & Natural Resources: This career cluster is focused on the production, processing, marketing, distribution, financing, and development of agricultural commodities and resources including food, fiber, wood products, natural resources, horticulture, and other plant and animal products or resources.
- Architecture and Construction: This career cluster is focused on careers in designing, planning, managing, building, and maintaining the built environment.
- Science, Technology, Engineering & Mathematics: This career cluster is focused on planning, managing, and providing scientific research and professional and technical services (e.g., physical science, social science, engineering), including laboratory and testing services, and research and development services.
UN Sustainable Development Goals
Clean Water and Sanitation: Goal 6 aims to ensure the availability and sustainable management of water and sanitation for all.
Credits:
Lesson by Kathy Ceceri
Copyediting by Erica Williams
Digital Production by Sandy Roberts
![]()
Special thanks to the ISS National Laboratory and the Center for Advancement of Science in Space™ (CASIS™) for funding this resource. Working together with NASA, the ISS National Lab aims to leverage the space station to inspire the next generation.
This resource is part of Science Friday’s Down To Earth: Space Science For Community Change program.
Educator's Toolbox
Meet the Writer
About Kathy Ceceri
@KathyCeceriKathy Ceceri is the author of over a dozen books for kids featuring hands-on STEAM activities. She also teaches enrichment workshops at schools, museums, libraries, and afterschool programs, creates educational materials for organizations like the Girl Scouts and Science Friday, and shares her projects and advice to help parents and educators make learning more engaging and fun.