Grade Level
6-12
minutes
1- 2 hrs
subject
Physical Science
This hands-on, guided-inquiry activity helps students to understand the geometry of lunar and solar eclipses by creating a physical, proportional model of the Earth and Moon system and observing shadows. This resource is designed to supplement Physics by Inquiry for physics teacher preparation and includes elements similar to those found in Ranking Tasks for Introductory Astronomy.
A printable and downloadable version of this and other eclipse activities is available on the American Association of Physics Teachers website.
Build A Scale Moon And Earth Model
To understand how solar eclipses occur, we will build off of what we already know about the phases of the Moon. In essence, we will expand our model to think about how the Sun, Earth, and Moon are aligned in order for an eclipse to occur.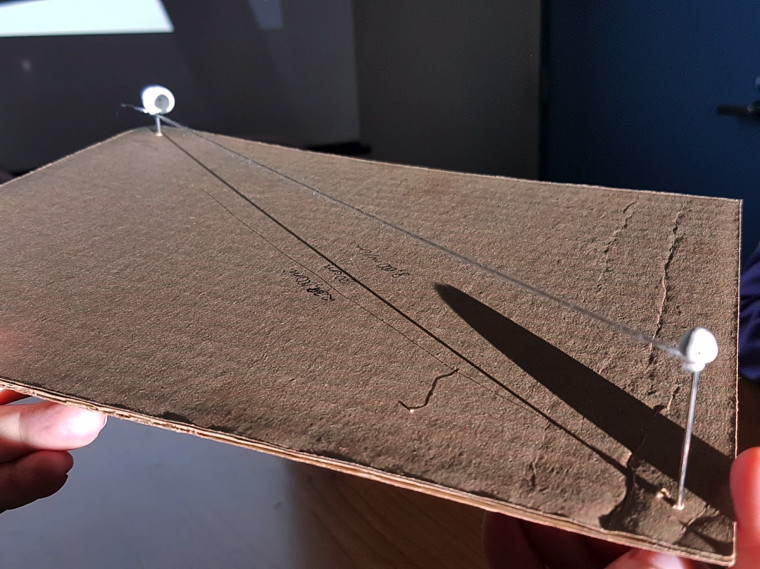
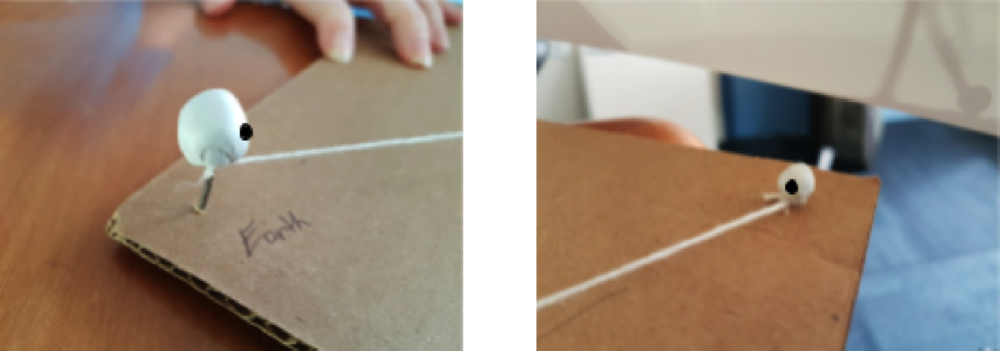
A. Build a scale model of the Earth-Moon system using a piece of letter-sized piece of cardboard with two pins or nails inserted at opposite corners of the cardboard. (Insert the nails from the bottom, so that the sharp ends are pointed upward).
B. Place small balls of clay on top of the pins or nails to represent Earth and the Moon. The size of each piece of clay will be determined below.
- Determine the scale of your system by determining the distance between the two pins or nails. Explain how you did this in words or with math. (The average distance between Earth and the Moon is 238,900 miles).
- Using the scale for your model, make Earth and the Moon proportional sizes. Explain how you did this in words or with math. (Earth radius = 3,959 miles; Moon radius = 1,079 miles).

C. Connect Earth and the Moon with a taut piece of string. Ensure that the string remains attached right at the base of the clay. The cardboard will represent the orbital plane of Earth as it goes around the Sun, and the string will represent the orbital plane of the Moon as it goes around Earth.
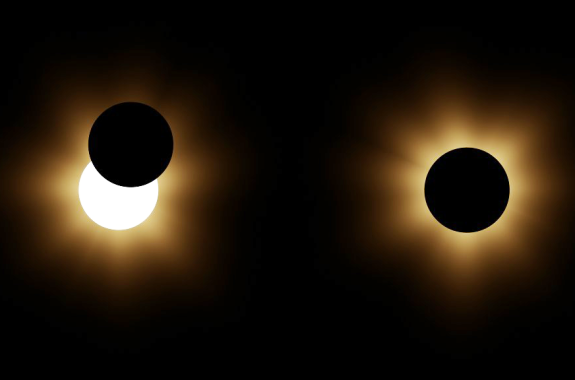
D. Begin with the string parallel to the cardboard. Using a diffuse, bright light such as the Sun or a projector beam, place the model so that the Moon is closest to the light, and Earth is farthest away. The Sun, Earth, and Moon should be perfectly aligned so that they all fall in the same line. Observe the shadow that falls onto a piece of paper held vertically just beyond Earth.
- Where does Earth’s
 shadow appear? What does it look like?
 - Where does the Moon’s shadow appear? What does it look like
- Identify any similarities and differences between Earth’s and the Moon’s shadows.
- Create a sketch below showing what this setup looks like from a side-view of the Sun, Earth, and Moon system. Include a sketch of how the shadows are produced and where they fall. Label each object.
- Create a sketch below showing what this setup looks like from a top view of the Sun, Earth, and Moon system. Include a sketch of how the shadows are produced and where they fall. Label each object.
- What is the phase of the Moon during a solar eclipse? Explain how you know
E. You might be aware that it is fairly rare to see a total solar eclipse. (Total solar eclipses can only be observed at the same location about every 375 years, with typically 2 total solar eclipses visible at some point on Earth each year). Elaborate on one or two possible reasons why you might not see total solar eclipses each month.

As was noted in the previous exercise, total solar eclipses do not occur each time there is a New Moon. This is due, in part, to the fact that the Moon does not lie on the same plane as the Sun and Earth (the Plane of the Ecliptic).
Each month, the Moon passes through the Plane of the Ecliptic at an angle of 5° above and below. In this first exercise, the string was parallel to the cardboard, and Earth and the Moon were both in the Plane of the Ecliptic. In the next exercise, you will make the Moon go above and below the Plane of the Ecliptic.
Model The Plane Of The Ecliptic
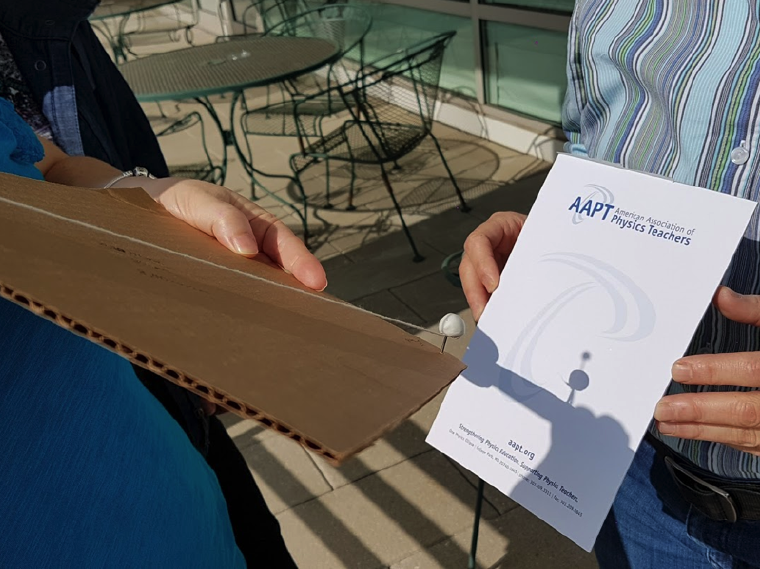
A. Push and pull on the nail representing the Moon, so that the string is no longer parallel to the cardboard. Orient the Moon so that its shadow appears to the left of Earth (when observing the shadows on a piece of paper, like in the diagrams below). Slowly rotate the system so that the Moon’s shadow moves toward the right. Observe how this changes the shadows produced on the paper. Draw the progression of the projected images seen on the paper for the following scenarios.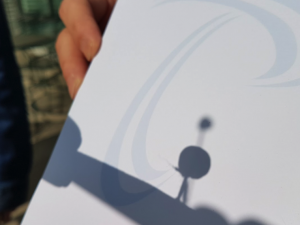
- The Moon is “higher” than Earth. The Moon passes above Earth’s plane.
- The Moon is “level” with Earth. The Moon passes along Earth’s plane.
- The Moon is “lower” than Earth. The Moon passes below Earth’s plane.
B. Which of the above scenarios is a total solar eclipse? Explain your reasoning.
C. Consider the scenario you selected that represents a total solar eclipse. Notice, however, that the projected images you drew in all three cases above is not what is actually viewed by people during a total solar eclipse. Using your pen or pencil, place a dot on the surface of Earth and the Moon where they face one another.
- Draw a sketch of what would be viewed from Earth when looking toward the Moon during a total solar eclipse.
- Draw a sketch of what would be viewed from the Moon when looking toward Earth during a total solar eclipse. Try to represent this as accurately as possible.
In this exercise, you drew a sketch showing what would have been observed from the Moon when looking toward Earth. NASA has captured images of the shadow on Earth, called the Moon’s umbra, animated below:
One place that our cardboard and clay model of the Moon and Earth fails is in the size of the shadow on Earth.
Evaluate Your Model And Make Predictions
A. Compare the size of the umbra on the clay Earth in your model to the size of the umbra shown in the image above from NASA.
- How are they different?
- What do you think might account for this difference in size? If you are unsure, try modeling eclipses in front of different types of light sources, including sources that are point sources (such as a smartphone flashlight), sources that are diffuse, more and less intense, and nearer or farther.
B. Because the umbra does not fully cover the surface of Earth that is facing the Sun during a solar eclipse, not everyone has the same view during the eclipse! On the “pop-outs” on the diagram below, sketch what would be observed by people in boats at various points in the Pacific Ocean at the moment this image was taken. Label the Sun and the Moon in your sketches. (Printable version)

Tips For The Teacher
- Light source: A 300-W directional flood light works reasonably well.
- If available, use calipers to measure diameters of Earth and Moon balls.
- Clay tends to work a little better than Play-Doh. In either case, the lighter the color, the better, at least for Earth.
- Use cardboard or black foamboard; white foamboard will be too reflective.
- If you can get the light source parallel to the desk or table, so the cardboard can sit on the surface, it makes alignment a bit easier. Then set the cardboard on something like a book with smaller dimensions to allow for movement of the pins up and down for the Plane of the Ecliptic activity.
- Blacken, cover, or otherwise dim any light sources as much as reasonable.
- If you don’t have block periods of more than an hour, you’re likely to need a second day. Consider where you’ll store the setups between lessons.
- Students do not require the setup to make predictions (Evaluate Your Model And Make Predictions, sections B and C) so predictions may be done as homework.
Credits
This resource was developed by J. Bailey, R. Vieyra, and S. Willoughby. The co-authors acknowledge useful discussions with B. Ambrose, X. Cid, and R. Lopez, and the support of a subcontract from the NASA Heliophysics Education Consortium to Temple University and the AAPT under NASA Grant/Cooperative Agreement Number NNX16AR36A
Header image: NASA Scientific Visualization Studio

NASA Heliophysics Education Consortium
AAPT and Temple University are proud to be among the 27 partners in the NASA Heliophysics Education Consortium. This 5-year initiative from NASA’s science directorate leads the development of research-based instructional materials for astrophysics taught in the context of introductory and upper division physics and astronomy courses, as well as K-12 teacher preparation.
The AAPT/Temple resource development team have created a number of products that are designed for use in formal classroom environments to help students understand Earth, Moon, and Sun relationships in the context of the 2017 Total Solar Eclipse. These resources are based upon common conceptual struggles students encounter with these topics and have been vetted by the team in their own classrooms.
Find more free eclipse 2017 education resources developed by AAPT and Temple University here: https://www.aapt.org/resources/eclipse2017/
Meet the Writers