Grade Level
All
minutes
15 min - 1 hr
subject
Earth Science
stem practices
Planning and Carrying Out Investigations
Activity Type:
STEAM, Family activity, space, After School Activity
This activity is part of the Science Friday Sun Camp collection!
The Sun generates an incredible amount of energy, energy that you can see and feel as light and heat. Other forms of energy from the Sun are invisible to humans. Even if you can’t see them, the charged particles, magnetic fields, and gamma and x-rays the Sun makes affect the Earth. More than that, when these invisible forms of energy interact with a planet’s magnetic field and atmosphere, they create some of the solar system’s most beautiful displays of color and light.
You may not realize it, but there is weather in space, driven by the Sun. Solar weather affects the Earth in many ways, not all good. To understand how that happens, you must understand solar wind and magnetic fields. So break out your magnets, because you’re going to experiment with the shielding force that protects our planet.
Can’t wait to get started? Jump to the experiment!
Solar Wind Blasts Into Space
The surface of the Sun is constantly changing as electrically-charged plasma interacts with magnetic fields to cause a variety of solar activity—cool magnetic sunspots, energetic solar flare explosions, and the giant bubbles of plasma called coronal mass ejections (CMEs). The eruptions from flares and CMEs expel radiation into space. Combined, this activity creates a type of weather called space weather, which can interfere with radio communications, power grids, and satellites around Earth.
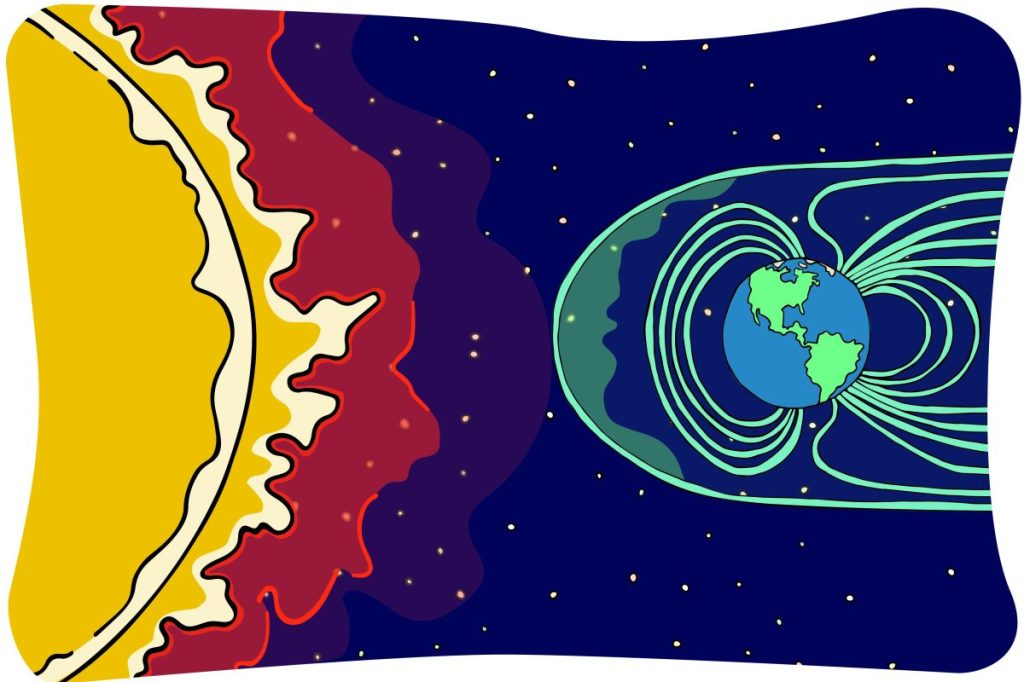
Far above the visible surface of the Sun, its super-hot outer atmosphere, the corona, also interacts with the magnetic fields on the surface. The corona’s particles form beautiful streamers, loops, and plumes that extend far away from the Sun’s massive body. These highly energized particles can escape the Sun’s gravity, the intense force that pulls everything to the center of a body of mass. Let loose the particles are hurled into space at speeds of up to a million miles per hour, dragging some of the Sun’s magnetic field with them. The solar wind is the flow of magnetic fields and charged particles from the Sun.
The solar wind travels billions of miles to the edges of the solar system. As it does, the solar wind interacts with every planet. The combination of radiation, magnetic fields, and charged particles that the Sun hurls into space can affect the Earth and the rest of the solar system. Solar wind batters the surface of asteroids and planets without an atmosphere. It changes the composition of the Moon’s surface and creates a bubble of electrified particles around Mars. On Earth, solar wind can be dangerous to both organisms and technology.
Luckily, the Earth has its own magnetic field, called the magnetosphere.
The core of the Earth is made of iron and nickel. As the Earth rotates on its axis, the hot, liquid outer core churns and moves around the solid inner core. This movement produces an electrical current that generates and maintains the strong magnetic field around the planet. The field has two opposite poles located at the north and south of the planet, much like a regular bar magnet.
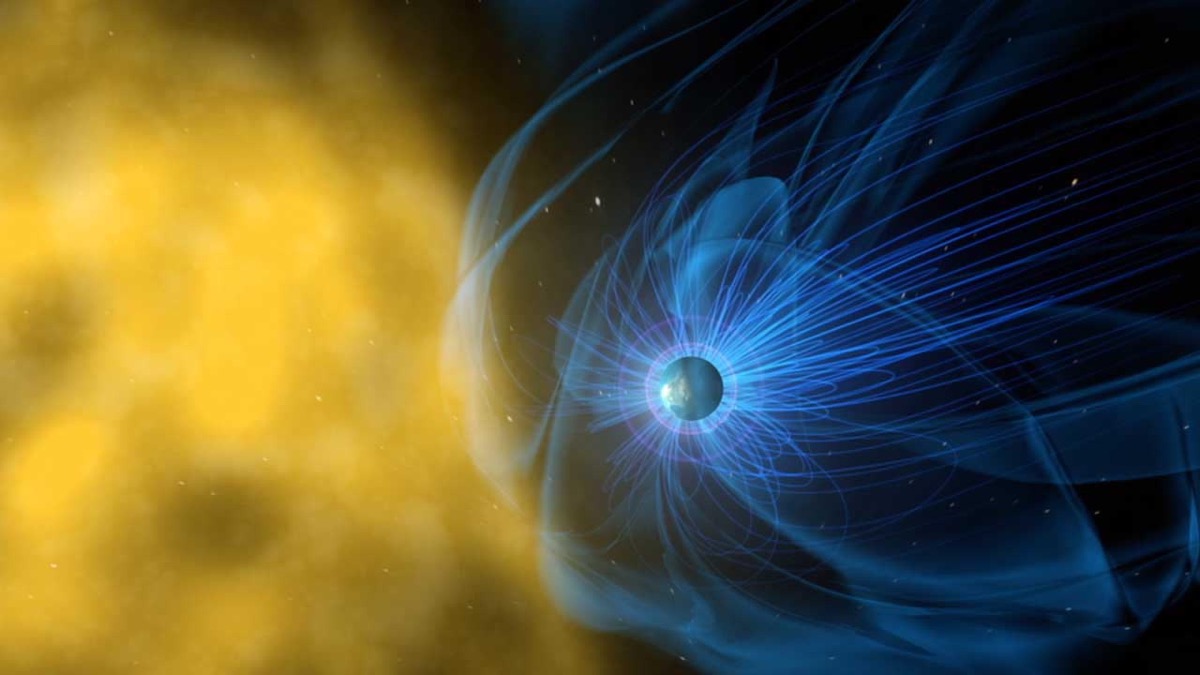
The Earth’s magnetosphere and atmosphere form a protective shield against the solar wind generated by our sun. Most of the charged particles crash into this shield and flow around it along the field lines of our magnetosphere. The side of the magnetosphere that faces the Sun is squished and flattened by the electromagnetic force of the solar wind against it, while the other side is pulled and stretched out like a tail.
The Sun Creates a Light Show
Sometimes the charged particles from the sun get past the Earth’s magnetic shield. That usually happens when a solar storm or CME sends extra radiation towards the Earth, which combines with the solar wind particles. Those particles get caught in the Earth’s magnetosphere. Then they crash into the electrically-charged gases of the Earth’s ionosphere, exciting and adding energy to the ionosphere’s gaseous molecules. When molecules in the ionosphere get excited, they give off light, creating a beautiful visible atmospheric light show called an aurora.
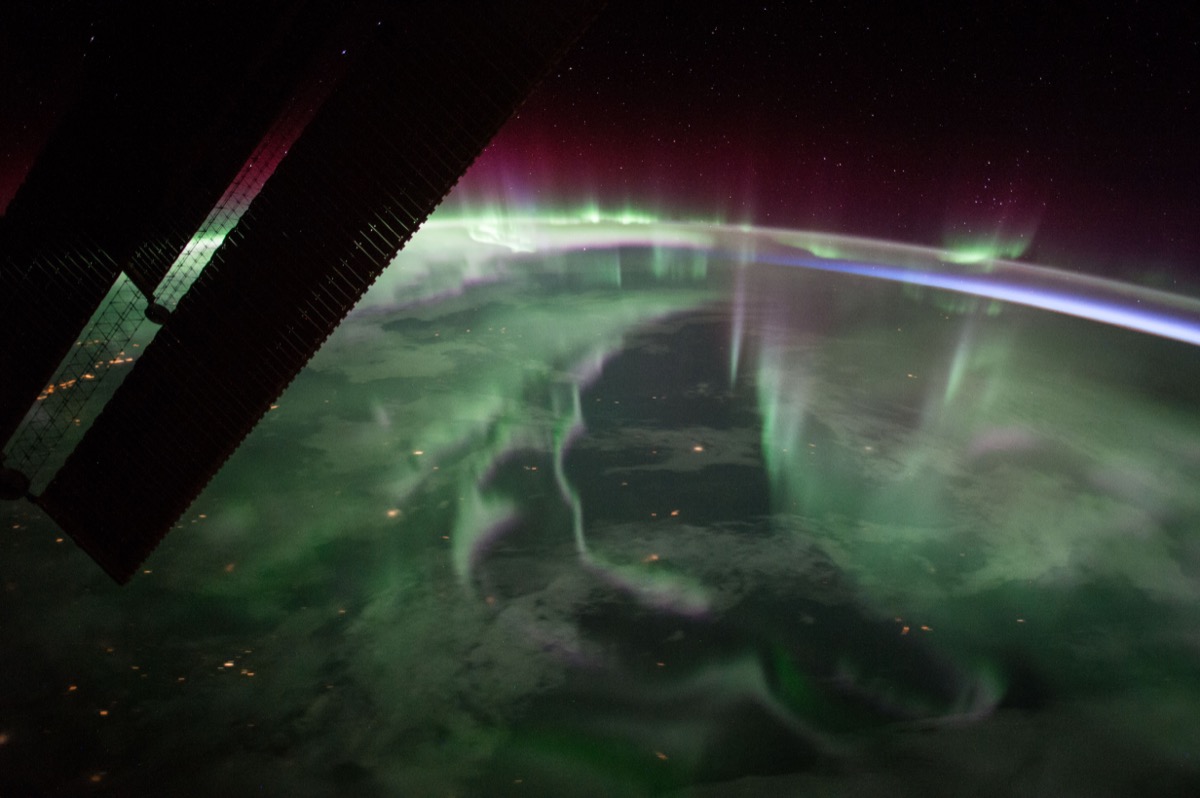
Auroras are bright, beautiful bands of colored light high up in the sky. Different gases in Earth’s ionosphere create different colors of light when they become excited by collisions with charged particles from the sun. The wavelength of the light (and therefore the color) depends upon the electronic structure of the atoms themselves, and on the energy of the charged particles colliding with the atoms. High in the atmosphere, oxygen creates a red color, but in the middle layers oxygen creates bright green waves. Nitrogen in the lower layers of the atmosphere makes purple.
Though they can occur at any time, and are bright at night, they aren’t bright enough to be visible during the day. Auroras are seen most commonly near the Earth’s poles, forming ovals because of the shape of the Earth’s magnetic field. They are also more common when the Sun is particularly active. At the North Pole, auroras are called the aurora borealis, or the northern lights. At the South Pole, they are called the aurora australis, or the southern lights.
Earth isn’t the only planet to experience auroras. The solar wind affects many planets in the solar system. Auroras occur on Mars, Venus, Jupiter, Uranus, and Jupiter too.
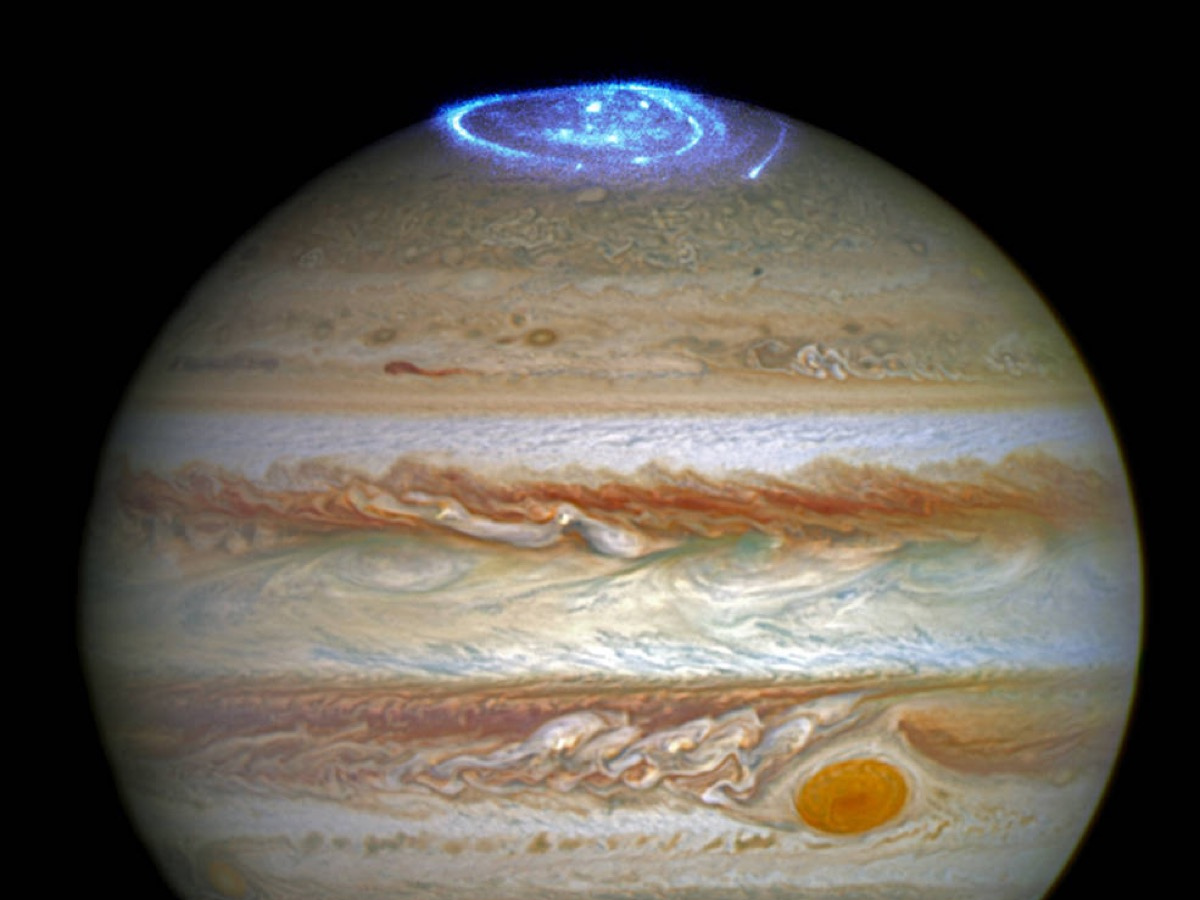
The Sun and the Earth generate strong magnetic fields that spread for thousands of miles. However, you don’t need something the size of a planet to learn about magnetism. You can use magnets at home to learn about magnetic fields on a much smaller scale!
Materials
Two bar magnets
Several items to test–coins, paperclips, aluminum foil, plastic caps, corks, etc.
A box of paperclips (if possible in at least two sizes)
Tape measure (optional)
Magnets from around the house (optional)
Small plastic container with lid (optional)
Safety and clean-up notes: This activity is recommended for children over 3 because magnets are choking hazards and can be dangerous if swallowed. Closely supervise young children during this activity. For young children, place a magnet inside a container with a lid so they can explore its effects without accessing it directly. Keep all magnets away from electronic objects such as cell phones.
Testing Magnetism
Try the following small experiments to learn a bit about how magnets work:
- Repulsion: Like our planet Earth, all magnets have a north and south pole. The same, or like, poles will repel each other. So if you try to push the north pole of one magnet against the north pole of another, the magnets will push away from each other. You can feel this repulsive force. Try it with your magnets.
- Attraction: The opposite poles of a magnet attract. If you put the north pole of your magnet near the south pole of another magnet, you will feel them pull together. The attractive force between magnets can be powerful. Watch your fingers!
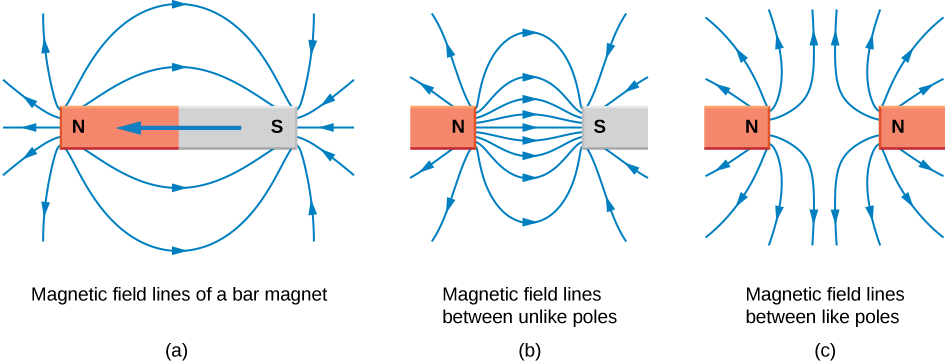
Now you know that magnets can attract one another, but what about things that aren’t magnets? Gather some items from around the house, are they attracted to or repelled by magnets? To find out, you will test to see what other objects respond to a magnetic field.
Activity 1: What Is Magnetic?
For this activity, you’ll try to figure out which objects around your house are magnetic and which are not. As you test things, take notes and look for patterns. Use your skills of observation to help you.
- Scavenger hunt! Look around the house for several different small items. Try to select things made of different materials and objects in different shapes and sizes. Some examples include keys, plastic caps, cotton balls, fabric, coins, aluminum foil, paper clips, scrap cardboard, toothpicks, jewelry, etc.
- Before you test each item, make a guess: Will it be attracted to the magnet or not?
- Hold a magnet near each item. What happens?
- Make a pile of items attracted to the magnet and a pile of things not attracted to the magnet.
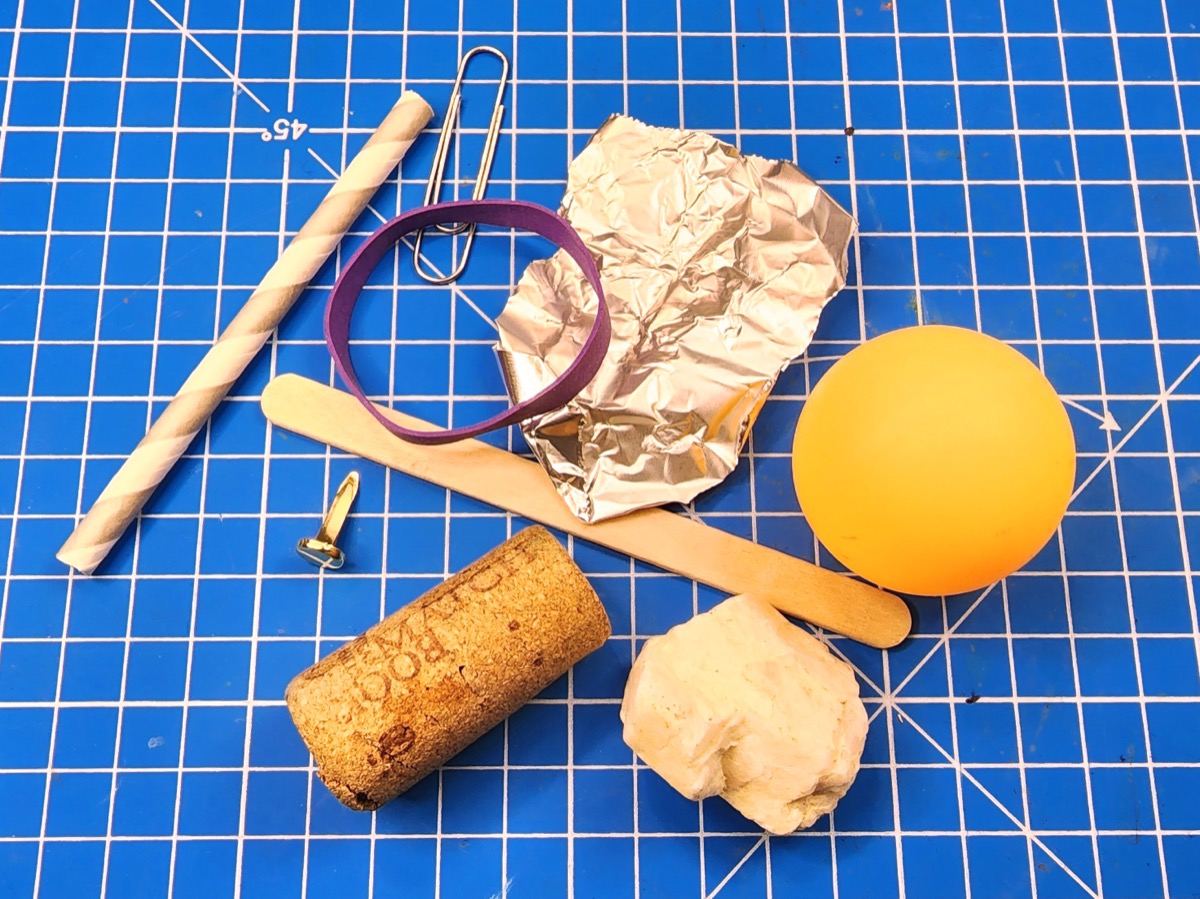
Review the items in each pile. Ask yourself these questions.
- What items were attracted to the magnet? How were they similar?
- Which items were not attracted to the magnets? Why do you think this was?
- What conclusions can you draw about the types of objects that respond to magnets?
You may have discovered that non-metallic objects were not attracted to the magnet, while some metals were. Metals like iron, nickel, cobalt, and steel are ferromagnetic. Ferromagnetic materials have a unique molecular structure. Their atoms have electromagnetic traits due to the motion and spin of their electrons. When combined together into a pattern that places those atoms facing the same direction in parallel lines, their individual magnetic fields are enhanced. As a result, ferromagnetic materials can be easily magnetized when exposed to a magnetic field. Materials like iron and magnetite, an oxide of iron (Fe3O4), naturally have their magnetic fields aligned and are permanent magnets. Strong magnets can also align the magnetic fields of weaker ferromagnetic materials, making them magnetic.
Magnets come in many different sizes, shapes, and strengths. Do you think you can tell how strong a magnet is just by looking at it? Let’s find out!
Activity 2: Testing The Strength Of A Magnet
- Make a pile of small paper clips. Make sure none of the paper clips are connected.
- Hold two paper clips end to end against each other. Let go of one paperclip. Do they stay connected? Why or why not?
- Hold your magnet in one hand. Bring a paperclip close to the magnet until it attaches.
- Bring a second paper clip close to the first paper clip, end to end, until it attaches to the paper clip (not the magnet).
- Continue adding paper clips and counting them as you go. Record how many paper clips you can pick up. Use a tape measure to record the length of the paperclip chain.
- Repeat the experiment but try using larger paper clips. Record your results.
- Connect a second magnet to the first magnet. Repeat the experiment, adding as many small paper clips as you can. Record your results.
- Test different sizes and types of magnets from around your house.
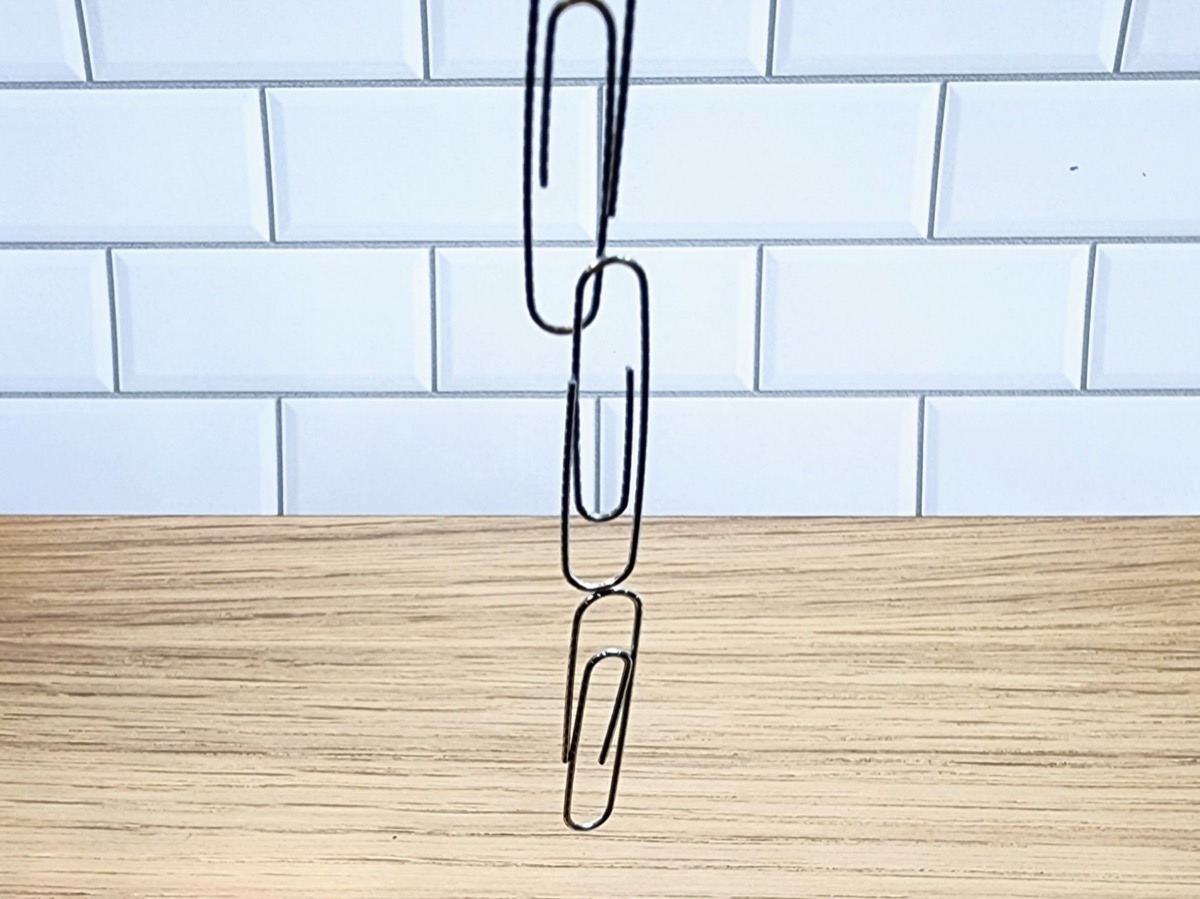
Consider these questions as you work on your experiment and compare your results.
- Does the number of items you can pick up with the magnet change if you change the size or mass of the items? What about the length of the chain?
- Can you add more paper clips if you combine magnets
- Does the size and shape of the magnet always reflect its strength?
- Did adding another magnet allow you to build a longer chain?
- Why did the paperclips stay attached to other paperclips even when the paperclip wasn’t touching the magnet?
- What other ways can you test the strength of your magnets?
What Makes A Strong Magnet?
When a steel paperclip touches a magnet, it becomes a temporary magnet. Each paperclip you add becomes a slightly weaker temporary magnet. However, eventually, there isn’t enough magnetic force to hold more paper clips. The stronger the magnetic field produced by the magnet, the more paper clips it will attract.
You may have discovered that the size of the magnet only sometimes relates to its strength. Some large magnets are weak; some small magnets are very strong. That’s because, more than its size, it’s the material that a magnet is made out of that can affect its strength.
For example, neodymium magnets are made of rare earth metals and are very strong magnets, even when very small. Ceramic magnets, on the other hand, made with iron oxide, are much less expensive and easy to make, so they are more common, even though they are generally weaker magnets. The magnets on your refrigerator are probably ceramic. Alnico magnets are made from aluminum, nickel, and cobalt (get it? Al – Ni – Co). These strong magnets are used in motors, sensors, and speakers or in places where high temperatures are necessary. As you saw in your paperclip experiment, not all magnets are permanent magnets. Electromagnets are a different type of temporary magnet. The magnetic field of an electromagnet only exists when an electric current is flowing through it. You can make an electromagnet at home using conductive wire, a nail, and a battery.
Keep Learning And Sharing
There are so many ways to continue exploring magnetism and solar weather. Here are just a few recommendations.
- Make a needle into a magnet…and a compass. Get a sewing needle. Rub a magnet along the sewing needle 10-15 times, always in the same direction. Hold the needle near a pin or paper clip. What happens? The magnetic field of the magnet aligned the molecules in the needle to act like a magnet. You made a weak, temporary magnet out of the sewing needle. This only works because most needles are made of steel, a ferromagnetic material. By floating it in a water bowl, you can quickly adapt your magnetized needle into a simple compass to point towards the North Pole.
- Draw auroras. You may not be able to visit the North or South Pole, but that doesn’t mean you can’t celebrate the beauty of an aurora. You can use dark-colored paper and colored chalk or pastels to make aurora art! While you’re at it, learn about the connections between the Northern Lights and the Iñupiat culture.
- Livestream auroras. To get inspiration for your artwork, visit The University of Alaska Fairbanks Geophysical Institute. They have a live camera that shows the sky at Poker Flat Research Range in Alaska in real-time, offering dramatic views of the aurora. Want to see one in real life? Auroras may be most common at the poles, but they can also happen in other places. Visit the Aurorasaurus website to check forecasts and report any sightings.
- Read about magnets. You can also read about magnetism and auroras to learn more. Try What Makes a Magnet by Franklyn M. Branley, Magnet Max by Monica Lozano Hughes, or Northern Lights by Marth E. H. Rustad. If you discover a great book, share your recommendation with Science Friday.
We’d love to see what you’re making! Share photos of your project with the hashtag #SciFriSunCamp on social media or send them to educate@sciencefriday.com.
NGSS Standards
This resource works toward the following performance expectations:
- 3-PS2-3: Ask questions to determine cause and effect relationships of electric or magnetic interactions between two objects not in contact with each other.
This activity is supported by the NASA Heliophysics Activation Team (NASA HEAT), part of NASA’s Science Activation portfolio.
Credits:
Written by Sandy Roberts.
Edited by Ariel Zych.
Illustration by Carrie Lapolla.
Digital Production by Sandy Roberts.
Have you registered for Sun Camp yet? Join today! You’ll get a weekly newsletter, access to interactive Q&As with real scientists, and extra resources for learning.
Meet the Writer
About Sandy Roberts
Sandy Roberts is Science Friday’s Education Program Manager, where she creates learning resources and experiences to advance STEM equity in all learning environments. Lately, she’s been playing with origami circuits and trying to perfect a gluten-free sourdough recipe.
