Grade Level
6 - 8
minutes
1- 2 hrs
subject
Physical Science
Activity Type:
Educator Collaborative, circuits, electricity, Solar Power, Physical Science

 Take a look at the figure above. It shows the percentage of the world still without access to electricity. As of 2014, much of the world still did not have access to electricity.
In order to make electricity more accessible worldwide, it should be generated using technology that is affordable, and using sustainable resources that are available anywhere—like wind, water, or sunlight. Capitalizing on solar energy could be a good alternative to using non-renewable resources for generating electricity for many reasons: Sunlight is available everywhere, solar power does not generate pollution the way fossil fuel-based energy does, and solar panels are becoming more affordable to manufacture. By learning how solar panels can be used to make a solar-powered circuit, we can begin to create the type of technology that could bring electricity to more people around the world.
In this engineering activity, you’ll reverse-engineer a solar circuit to build a simple, inexpensive, and lightweight device that is powered by the sun’s light.
Objectives:
- Students will disassemble a solar circuit and identify and harvest circuit components.
- Students will design an inexpensive, lightweight, solar circuit inspired by their exploration of a solar circuit.
- Students will integrate their circuit into a moveable origami structure so that the movement of the origami serves as the switch to the circuit.
Exploration: Hack A Solar Circuit
Disassembling a solar light will help you to understand how solar panel technology is used to make electricity and incorporated into electrical circuits. This activity requires appropriate safety equipment for all observers and participants and should be closely supervised by an adult.
Teacher Note: If you’d like your students to still be able to see the disassembly process you can do it as a demonstration in groups with students, or provide them with the light after you have taken it apart.
Materials Required
- Solar garden light or toy
(e.g. mini spotlights, stake lights, pathway lights, or a solar-powered dancing toy) - Precision screwdriver set, hammer, flathead screwdriver
- Safety glasses and leather work gloves (for all observers)
- Student Engineering Notebook

- Ensure that all observers and participants are wearing safety glasses and work gloves to protect your eyes and hands during the activity from plastic fragments.
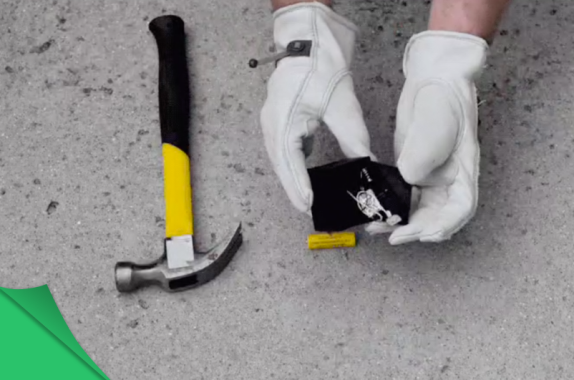
- Get an adult to help break apart one or more of the outer coverings of a solar-powered device.
- With the help of an adult, use tools like a screwdriver to remove all inner circuit components, being careful not to break individual components as you work. Avoid puncturing any of the electrical components; some may need force to be applied before they can be removed.
- Carefully examine the inside of the device and all of the individual circuit components. Here’s what you might find: a solar panel, LED bulb, transistor, battery holder with a battery, transistor and a chip. Use the checklist in your engineering notebook to guide you as you discover each of the components in the circuit.
Sketch And Explain The Solar Circuit That You Explored
- In your engineering notebook, draw the circuit you discovered inside the solar device showing the connection between the different components. Use the checklist of electrical components and symbols to represent each of the items you see inside the circuit. Your sketch should look something like this, but may have different components or connections:
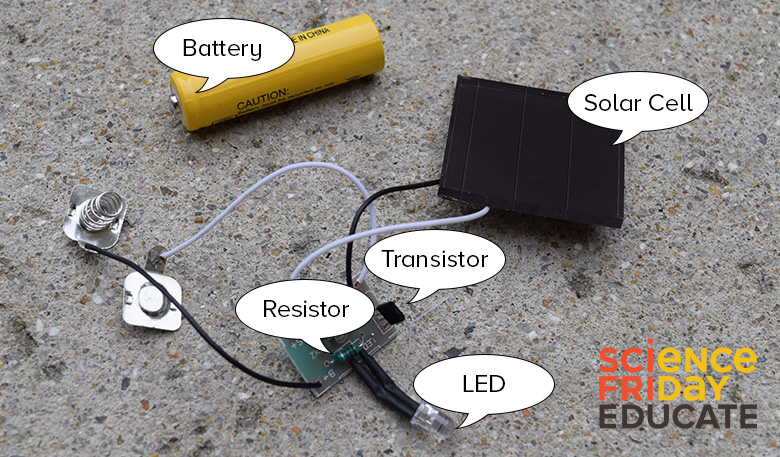
The typical components of an average solar garden light - On your solar circuit diagram, use arrows to illustrate the flow of electrons, and write a brief explanation of how electricity is generated and flows through the circuit.
What’s In A Solar Circuit?
A Solar Panel
Solar panels are made up of solar cells, also called photovoltaic cells. Solar cells are tiny electrical devices that convert energy from a light source, such as the sun, into electricity. Solar cells are made up of silicon, which is a type of semiconductor material (a material that can act as either an insulator or as a conductor). Each solar cell is made with a positively-charged silicon layer (p-type) sandwiched beneath a negatively charged silicon layer (n-type). The opposing charges between these two layers, through the exchange of electrons from the n-layer to the p-layer, form a microscopic electric field at their interface. When particles of light from the sun (photons) come in contact with solar cells, they collide with and move electrons within this electric field, generating an electric current between the two silicon layers that can be captured by conductive wires in an electric circuit.
These resources can provide additional information on how solar cells work:
How a Solar Cell Works – American Chemical Society
How Solar Cells Work Lesson Plan – Green Education Foundation
How Do Solar Cells Work? – Sci Toons
A Circuit
A circuit is a complete loop around which electricity flows. A circuit is made by linking electrical components (a fancy word for different parts of a circuit) together with a conductor like a wire. An electrical circuit must include a source of electricity, a conductor, and an electrical load. A source of electricity can be anything that drives the flow of electricity through the circuit, for example, a battery or a solar panel. Conductors are materials that electricity can flow through, such as copper wires. A load is any device within the circuit that consumes electricity. Loads can include motors, bulbs, buzzers, or anything else that is powered by electricity.
Try this online lab to learn more about circuits: Circuit Construction Kit – PhET
To gain a detailed understanding of circuits, check out these resources:
What’s A Circuit?- Northwestern University
Plan And Build Your Own Circuit
Using the solar circuit as inspiration, you will design, sketch, and build your own simplified solar-powered circuit. For this build, you need to focus on only two parts: the solar panel and the LED bulb.
If you are able to take the solar panel and the LED bulb from the garden light without damaging them (strictly under adult supervision only), you can use those supplies instead of buying them. However, for reliability, you may want to use new components.
Materials
- 5mm LED Light Emitting Diode
- Optional – low-voltage motor, fan, or piezoelectric buzzer
- Micro mini solar panel 1.5V — 3V
- Alligator clips connected with an insulated wire
- Engineering notebook
Sketch And Explain Your Planned Solar Circuit
- Sketch your planned solar circuit in your engineering notebook, in the same style and using the same symbols you used to sketch the solar circuit in the first activity. You can use the following diagram as a guide:
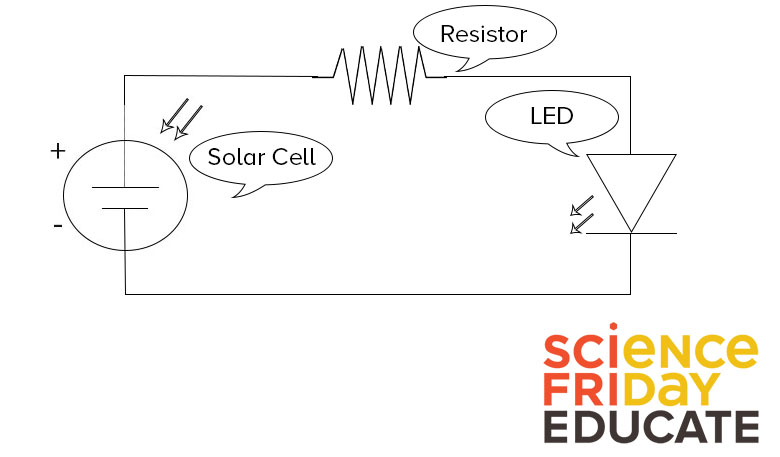
A schematic view of a solar circuit - Explain how and why your solar circuit will work, describing each of the components.
- Build and test your circuit, documenting your building steps along the way.
Build A Solar-Powered Origami Device
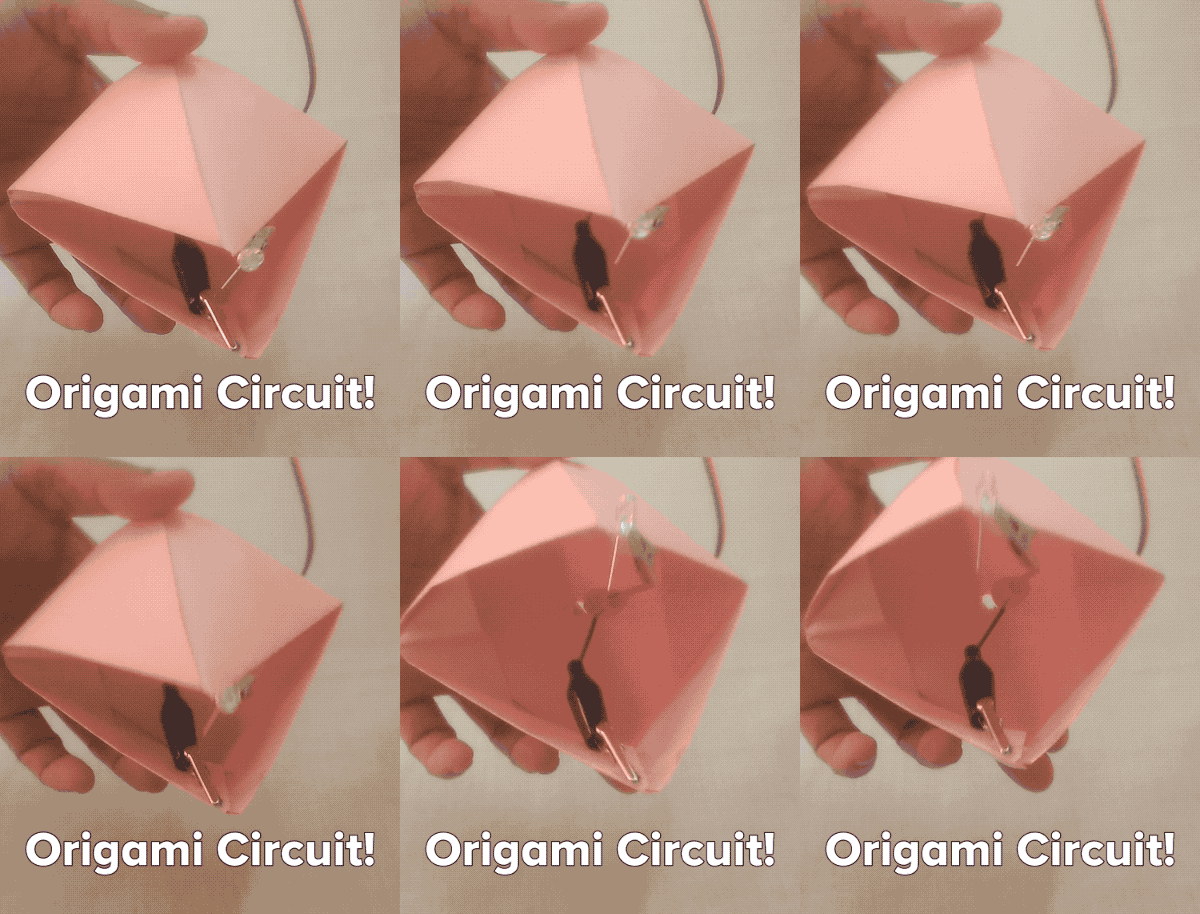
Small, foldable solar-powered devices that combine circuits like the one you just built and the principles of origami can be used to provide lights, electronics, or medical devices to areas with limited access to electricity—such as remote regions, places devastated by natural disasters, or outer space, for example.
Origami is an art associated with Japanese culture that uses folding to turn a piece of paper into a strong three-dimensional structure. Engineers have begun to investigate the potential of this art form to provide solutions to technological and engineering challenges. Applying origami principles to engineering can help create solutions for fitting large objects into small spaces, making ultra-light or extremely small devices, and designing structures that can easily move or change shape. The integration of origami in electronics has already been used to make self-assembling robots, solar panels for spacecraft, medical devices, and emergency housing.
Your challenge is to integrate your solar circuit into an origami structure that solves a real human problem.
Design Constraints
- Cannot be intended to harm humans or innocent animals
- Must address a problem that needs solving
- Cannot be built from anything besides the materials provided to you by your teacher
- Must work consistently after being folded and unfolded multiple times
Materials
- Solar-powered circuit (made from the previous activity)
- Origami paper (or square sheets of paper)
- Scissors
- Tape or glue
Design And Build Your Solar-Powered Origami:
- Identify a problem that your origami, solar-powered device will solve
- Make an origami Pac-Man, hat, fan, crane, or other origami structure (an animatable)
- Integrate and adapt your solar power circuit into your a technology using origami and your solar light circuit.
Origami Fan That Spins
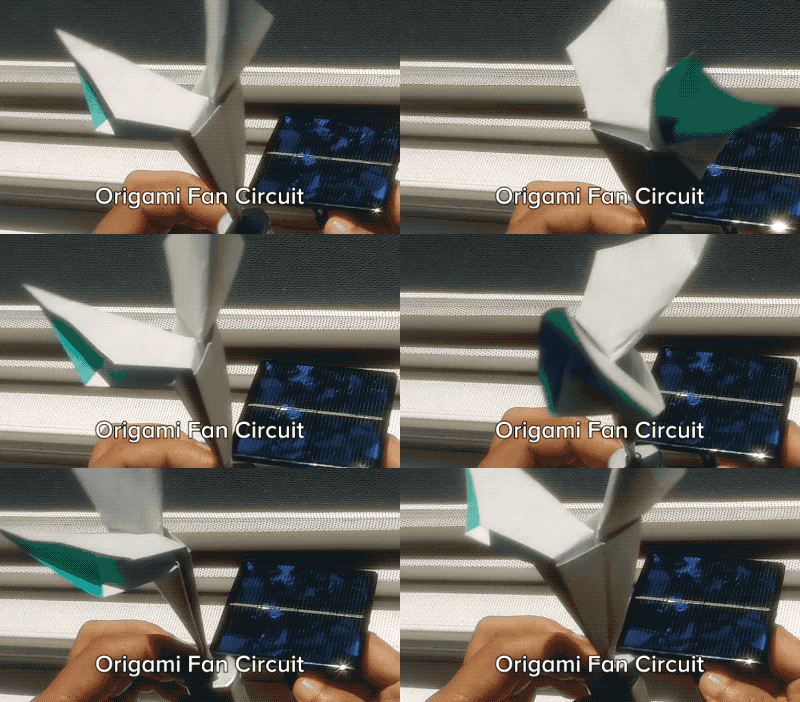
A solar-powered origami fan
Origami Pac-Man
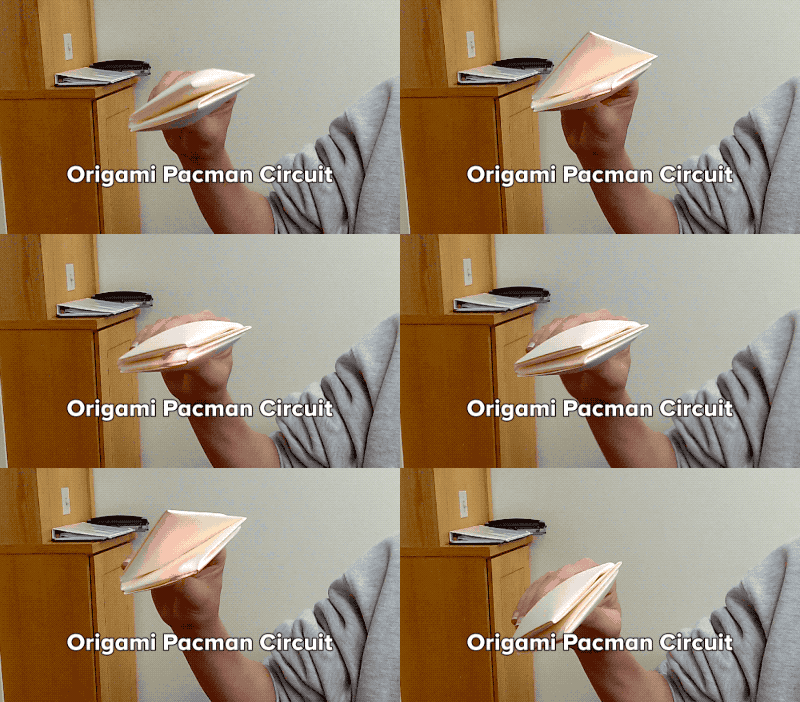
Origami Pacman Circuit
Origami Cap That Lights Up
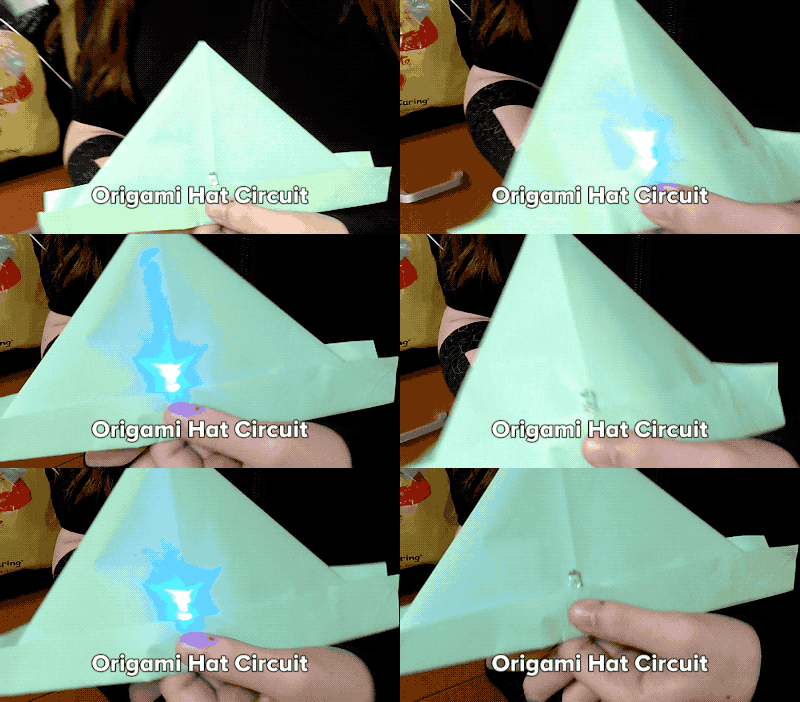
An origami hat circuit
Troubleshooting:
If your contraption does not work, here are some possible solutions.
- Make sure to connect the positive terminal of the solar panel to the positive terminal of the LED and negative terminal of the solar panel to the negative terminal of the LED.
- If your LED bulb does not glow, even after making the connections as described in the previous step, test it with a coin cell battery. If it does not work, you might want to try it out with another LED bulb.
- If the LED bulb works well with the coin cell battery but does not work with the solar panel, check if you have enough sunlight for the solar panel to be efficient.
- If you are using a good working motor and it does not start with a solar panel, it might need a gentle push from you to get started.
Share your work! Post your students’ innovative solar-powered origami on social media with the hashtag #solarorigami!
Reflection Questions:
Answer the following reflection questions about your solar origami creation:
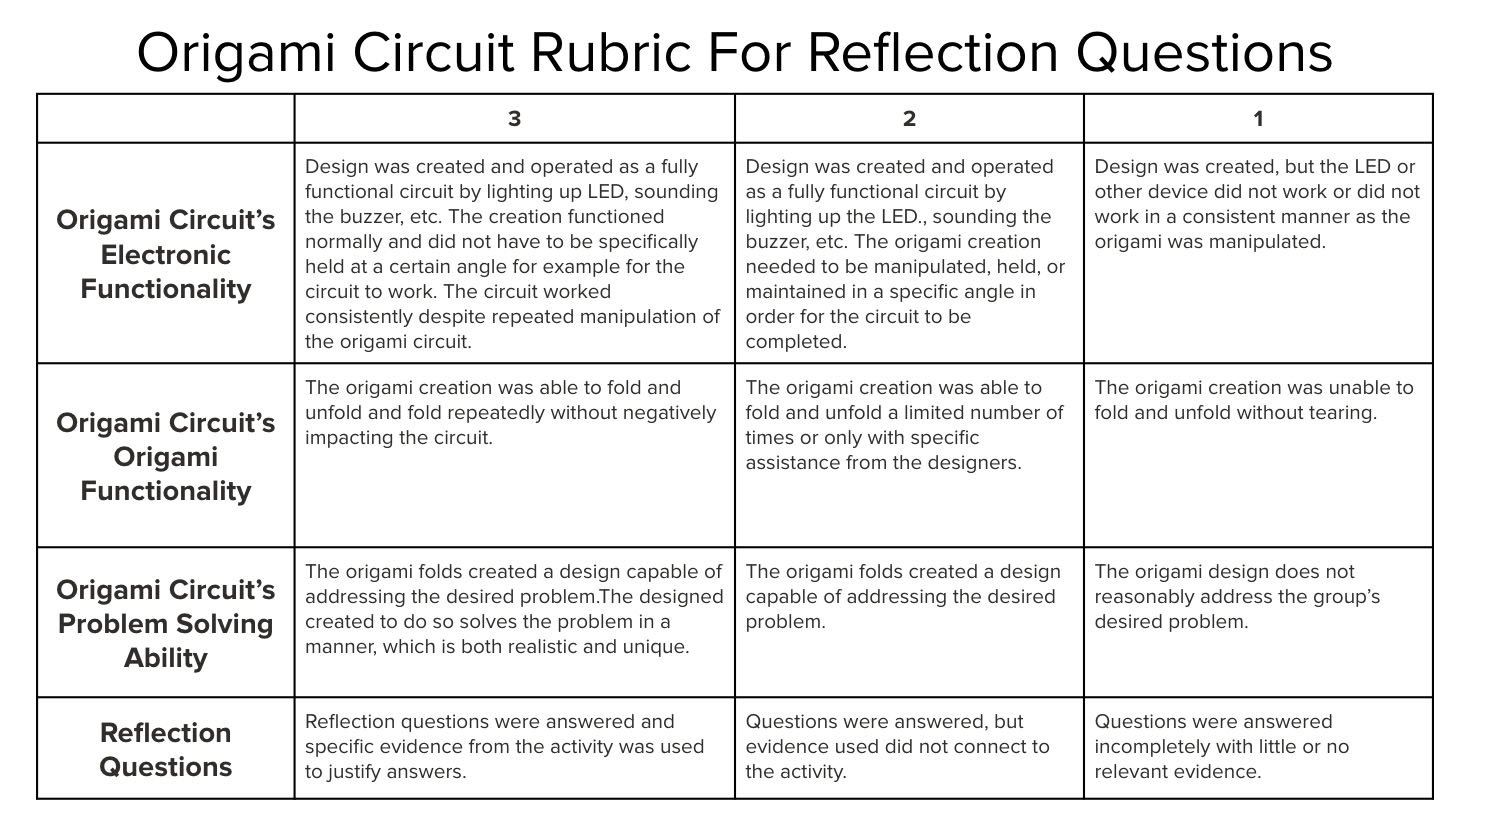
- Were you able to create a circuit with your origami creation? What evidence do you have that you created a circuit?
- Draw the origami circuit you created. Label the following components in your diagram: load, power source and conducting material. Explain how your circuit works.
- How does your solar panel work? Explain it in your own words.
- What are some of the benefits of using origami in STEM (science, technology, engineering, and math) careers?
- What are the some of the challenges you encountered during this process? How did you overcome your challenges?
- What ideas of your own did you apply to your creation? Why did you do so?
- Did you try other origami structures? Which one did you choose?
- After watching the applications of origami in different fields, which one impressed you? Why?
- What other areas do you think origami could be applied? How do you think it would help to design better solutions?
Standards
MS-ETS1-1 Engineering Design
Define the criteria and constraints of a design problem with sufficient precision to ensure a successful solution, taking into account relevant scientific principles and potential impacts on people and the natural environment that may limit possible solutions.
MS-ETS1-3 Design
Analyze data from tests to determine similarities and differences among several design solutions to identify the best characteristics of each that can be combined into a new solution to better meet the criteria for success.
MS-PS3-3
Performance Expectation: Apply scientific ideas or principles to design, construct, and test a design of an object, tool, process or system.
Credits:
Written By: Srividhya Sundaram
Gifs and illustrations by Srividhya Sundaram and Brian Soash
Digital Production: Lauren Young, Brian Soash
Editing: Lauren Young, Ariel Zych
Educator's Toolbox
Meet the Writer
About Srividhya Sundaram
Srividhya Sundaram is an 6th, 8th, and 10th grade teacher at the Joseph Kushner Hebrew Academy in Livingston, New Jersey. She’s an enthusiastic educator who believes in learning by discovery. Sri is a NASA Certified STEM Teacher Leader and has been recognized Jerry Gottesman Award for Teaching Excellence, Professional Learning and Community Collaboration.
