Grade Level
6 - 8
minutes
1-2 Class Periods
subject
Earth Science
Activity Type:
experiment, lab, life science
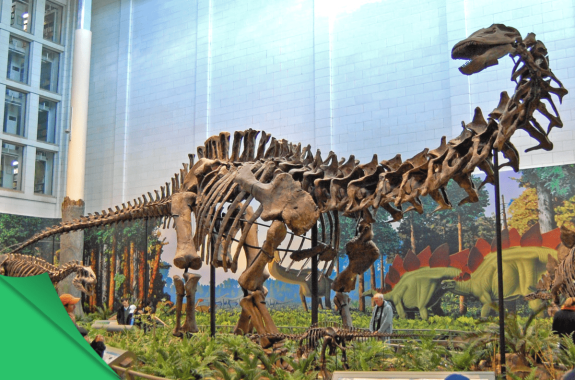
Imagine you’re in a natural history museum. You walk past the entrance gate, into the lobby, and come face to face with a dinosaur—or, the skeleton of one at least.
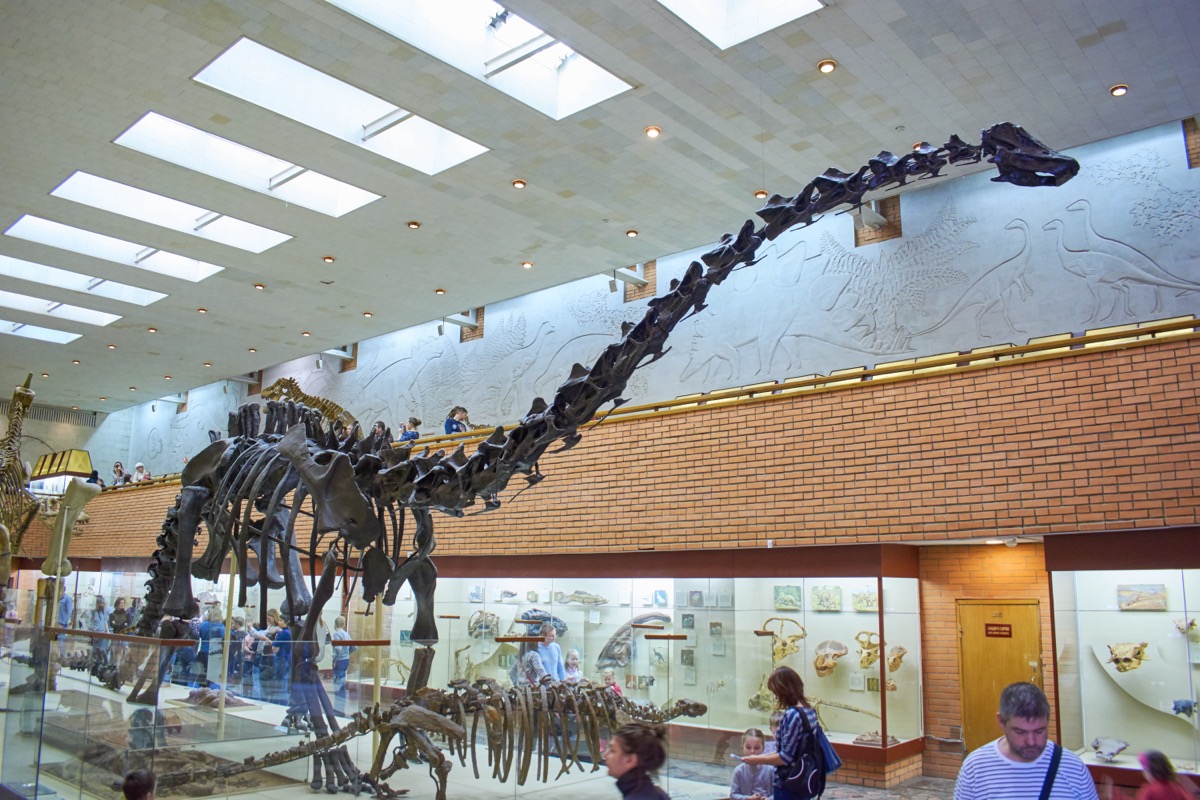
 This skeleton belongs to a sauropod, a long-necked, plant-eating gargantuan that roamed the Earth 150 million years ago. You’ve seen some members of this group before in Hollywood blockbusters—the Brachiosaurus in the Jurassic Park movies and Littlefoot from The Land Before Time.
As you get closer, the bones tell you one thing for certain: Littlefoot was a misnomer! This creature was MASSIVE (up to 20 meters long, and weighing over 50 tons!). After staring at its skeleton for a few minutes, you can’t help but wonder: Bones and fantasy movies are great, but what did it take for this animal to really live? How did it move? How did it reproduce? How did it eat? As you complete these activities, you’ll attempt to answer that last question, using fossil and recent evidence, and testing your own model of a sauropod digestive tract.

Learning About The Lives Of Dinosaurs
When an animal dies, its remains can be fossilized. This is great news for paleontologists—studying fossils can help answer a lot of questions about how extinct animals lived their lives. But usually only bones, shells, or other hard material make the cut. The rest of the animal rots away. That means that brains, guts, and other soft parts aren’t available for paleontologists to observe. If you’re a scientist studying these dinosaur soft parts, this can be a big problem. How can a paleontologist answer questions if they have no fossils to study?
[Learn more about how fossilization occurs in another SciFri education resource.]
Take the digestive system, for instance. How did sauropods digest the food they ate? In humans, we know what happens to our food. We chew it with our teeth, squeeze it down a muscular esophagus in our throat, digest it with acid in our stomachs, remove nutrients and water in the small and large intestines, and finally excrete whatever is left.
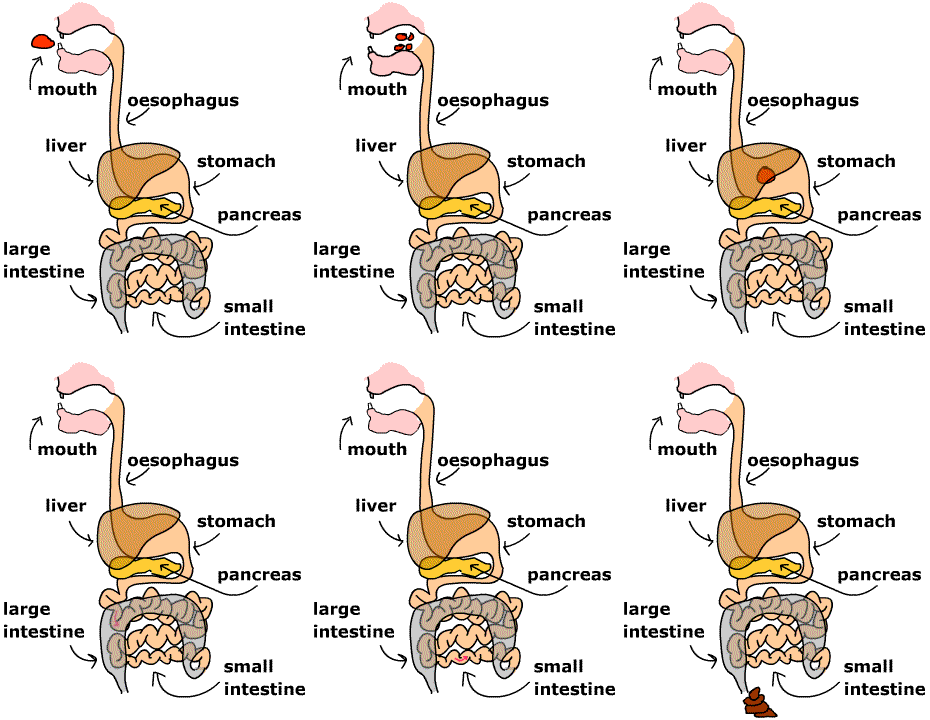
We know this because of observations, dissections, and scans of our digestive tract. It’s safe to assume that sauropods had a similar system. They had to eat somehow, but without fossilized stomachs, intestines, and other soft organs, it’s impossible to know exactly what their systems looked like from fossils alone.
While we may never know exactly what a sauropod stomach looked like, paleontologists can make a hypothesis. This is where experimental paleontology comes in. The name means just what it sounds like: Paleontologists conduct experiments to test their theories. By gathering data from fossils, observing the digestive tracts of modern animals, and conducting experiments, paleontologists can model sauropod digestive systems pretty accurately.
Fiona Gill and a team of other researchers conducted an experiment just like this in 2018, trying to figure out which plants would provide a sauropod with the most nutritious meal. Listen to the Science Friday interview below to learn more about their experiment and results.
Now it’s your turn. You will become an experimental paleontologist. Using examples of fossils and modern animals, you will develop and test your own sauropod digestive system.
Educator note: Students should do all activities in groups of 2-3, depending on resources and class size.
Activity 1: Research Fossils
Materials
— Paleontology Field Journal (PDF) (Powerpoint)
— Pencil
Procedure
Use your Paleontology Field Journal to answer questions, make observations, and sketch specimens. Remember, just like real paleontologists, your hypothesis and experiment will be based on evidence, so be sure to take good notes!
The Fossil Record
Before any hypotheses can be made about how sauropods digested their food, we first need to look at some hard evidence. This evidence is hard—literally. It’s fossilized rock!
Examine Sauropod Teeth
To develop a sauropod digestive tract, we first have to figure out what the sauropod is digesting! The best way to do that with fossils is by examining the teeth. Paleontologists are lucky here. Teeth are one part of the body that fossilize pretty easily. While there are around 30 species of sauropod, there are two main styles of teeth that are common across the whole group.
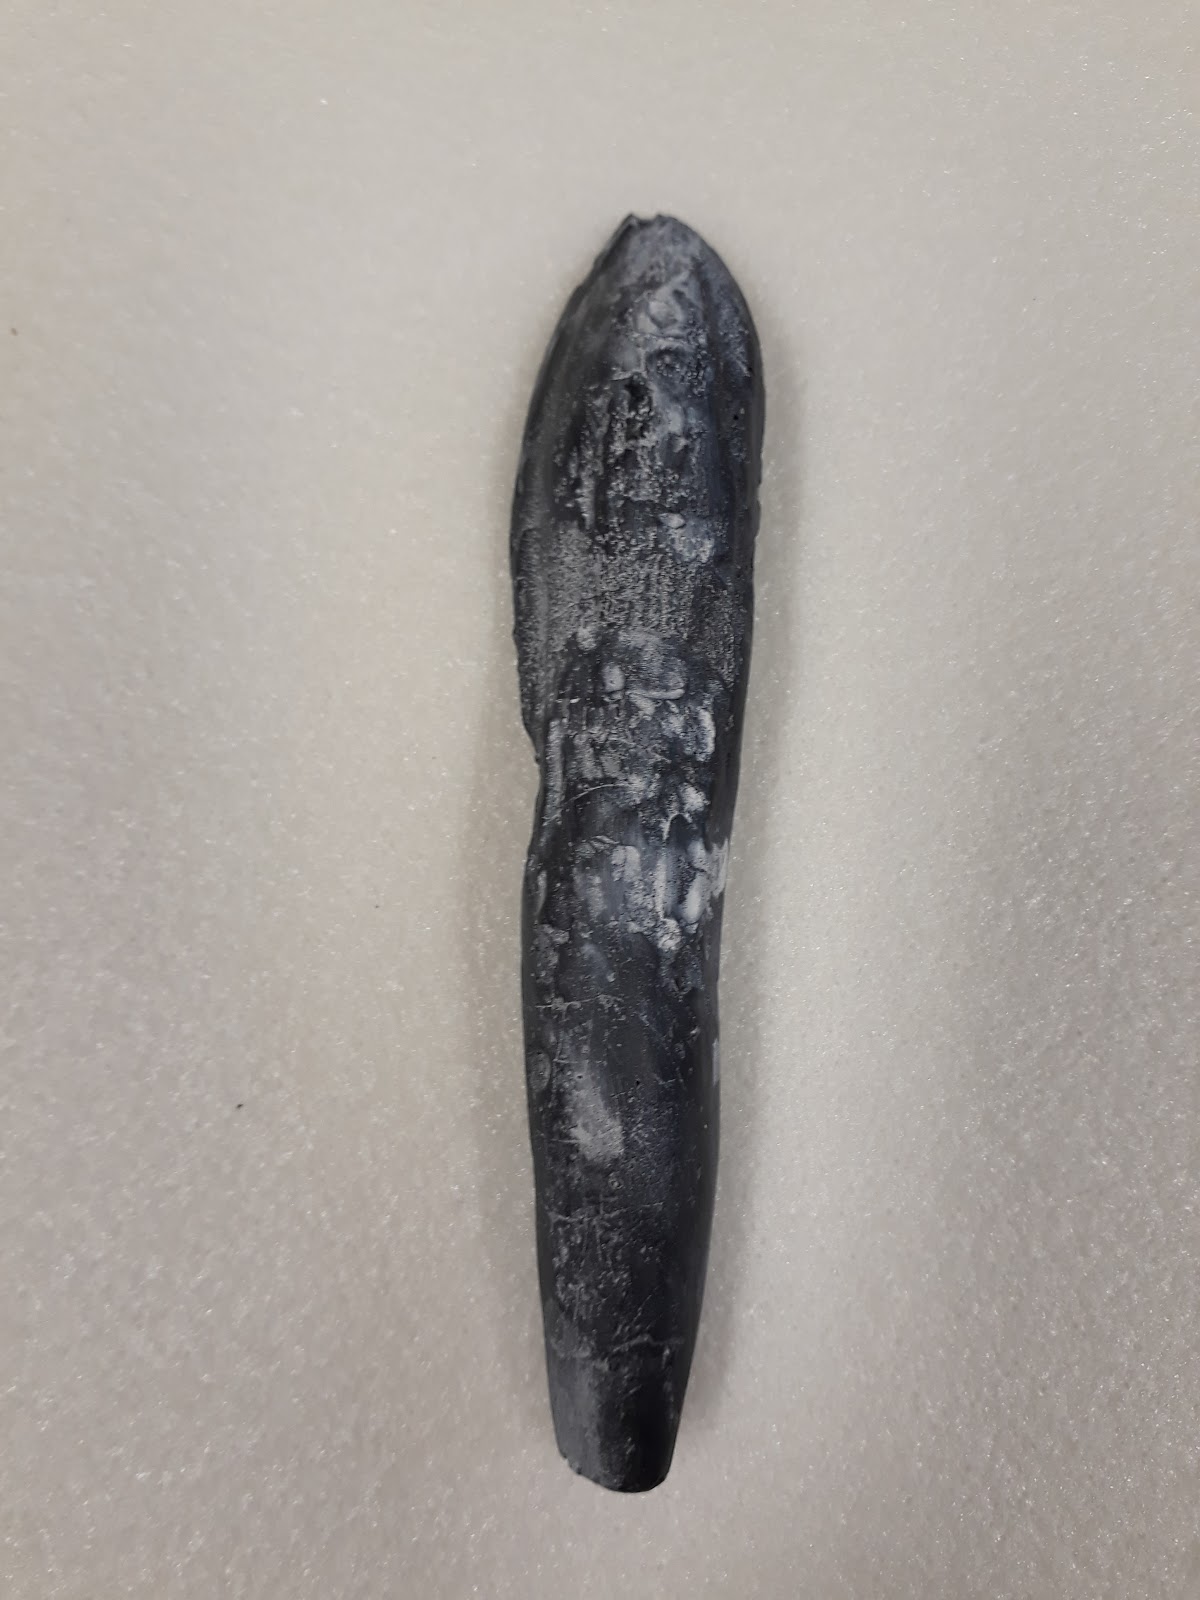
Look at the shape of the teeth in the diagrams below. Column A shows one shape, and Column B shows the other. Describe the shape of the two tooth types.
Based on the shapes, predict a sauropod diet. Do you think these sauropods ate mostly leaves, nuts, meat, or something else? Why?
- Type A
- Type B
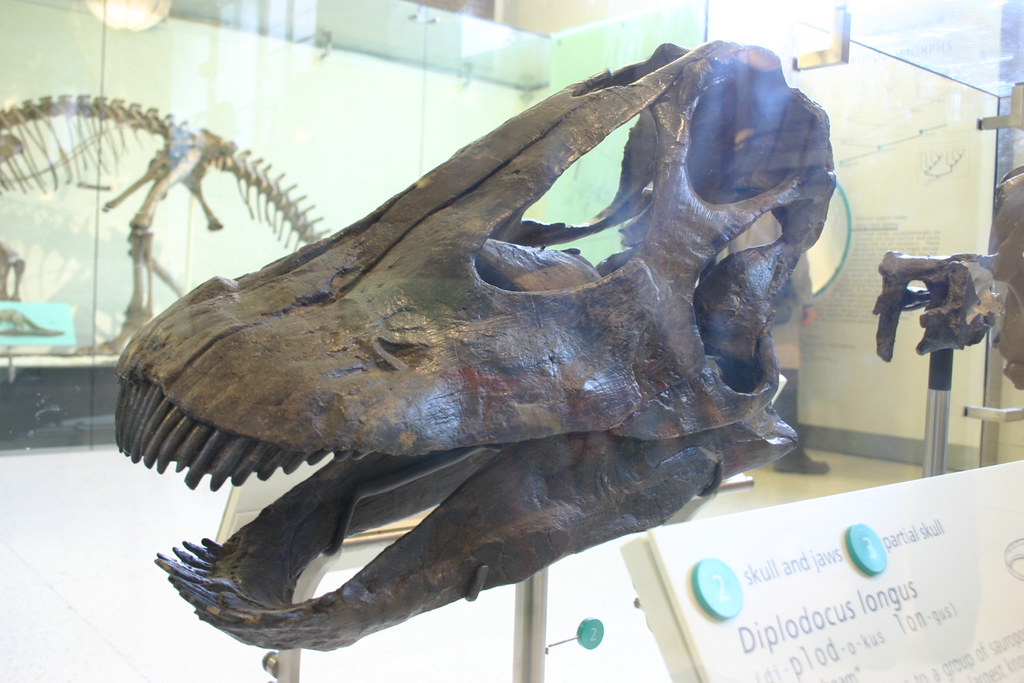
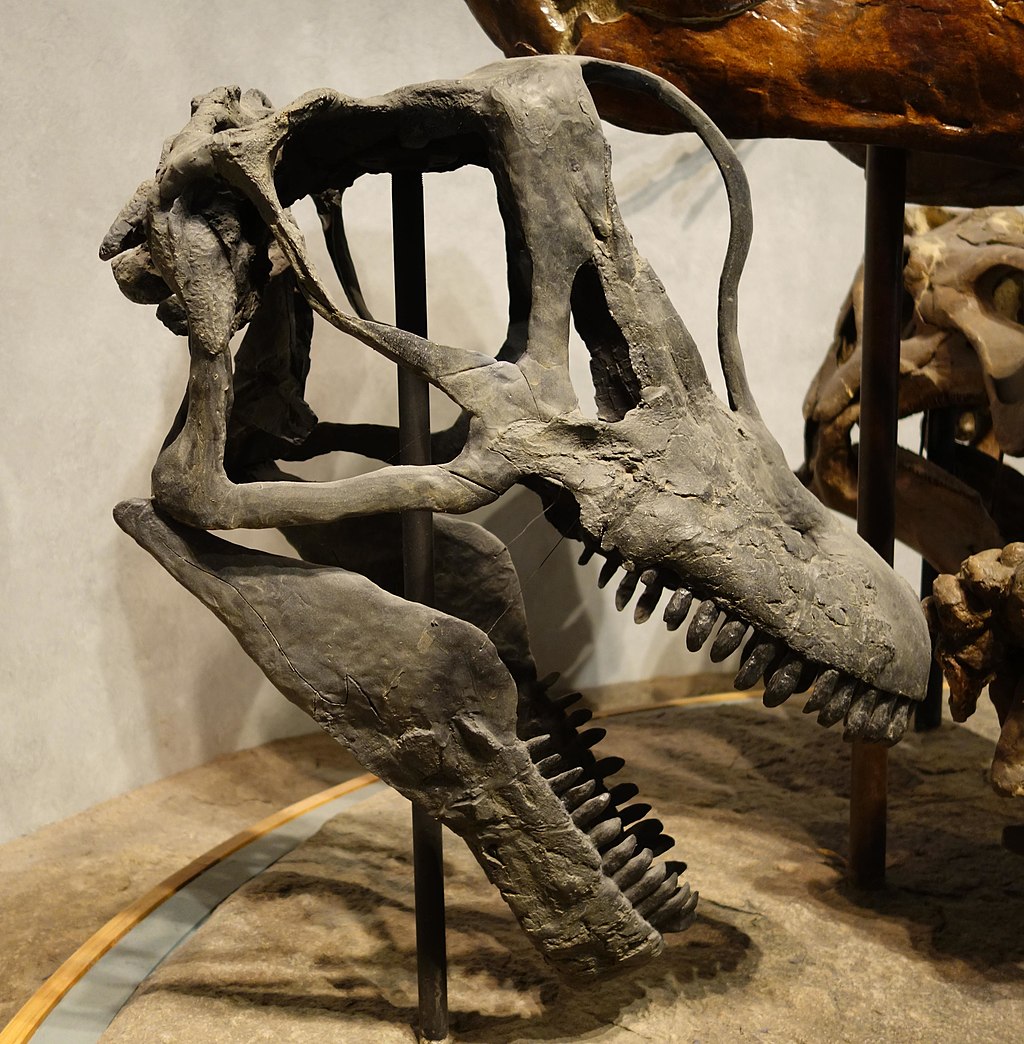
- Diplodocus longus, a species of Diplodocus. Credit: Ryan Somma/flickr/CC BY-SA 2.0
- Brachiosaurus skull. Credit: Etemenanki3/Wikimedia Commons/CC BY-SA 4.0
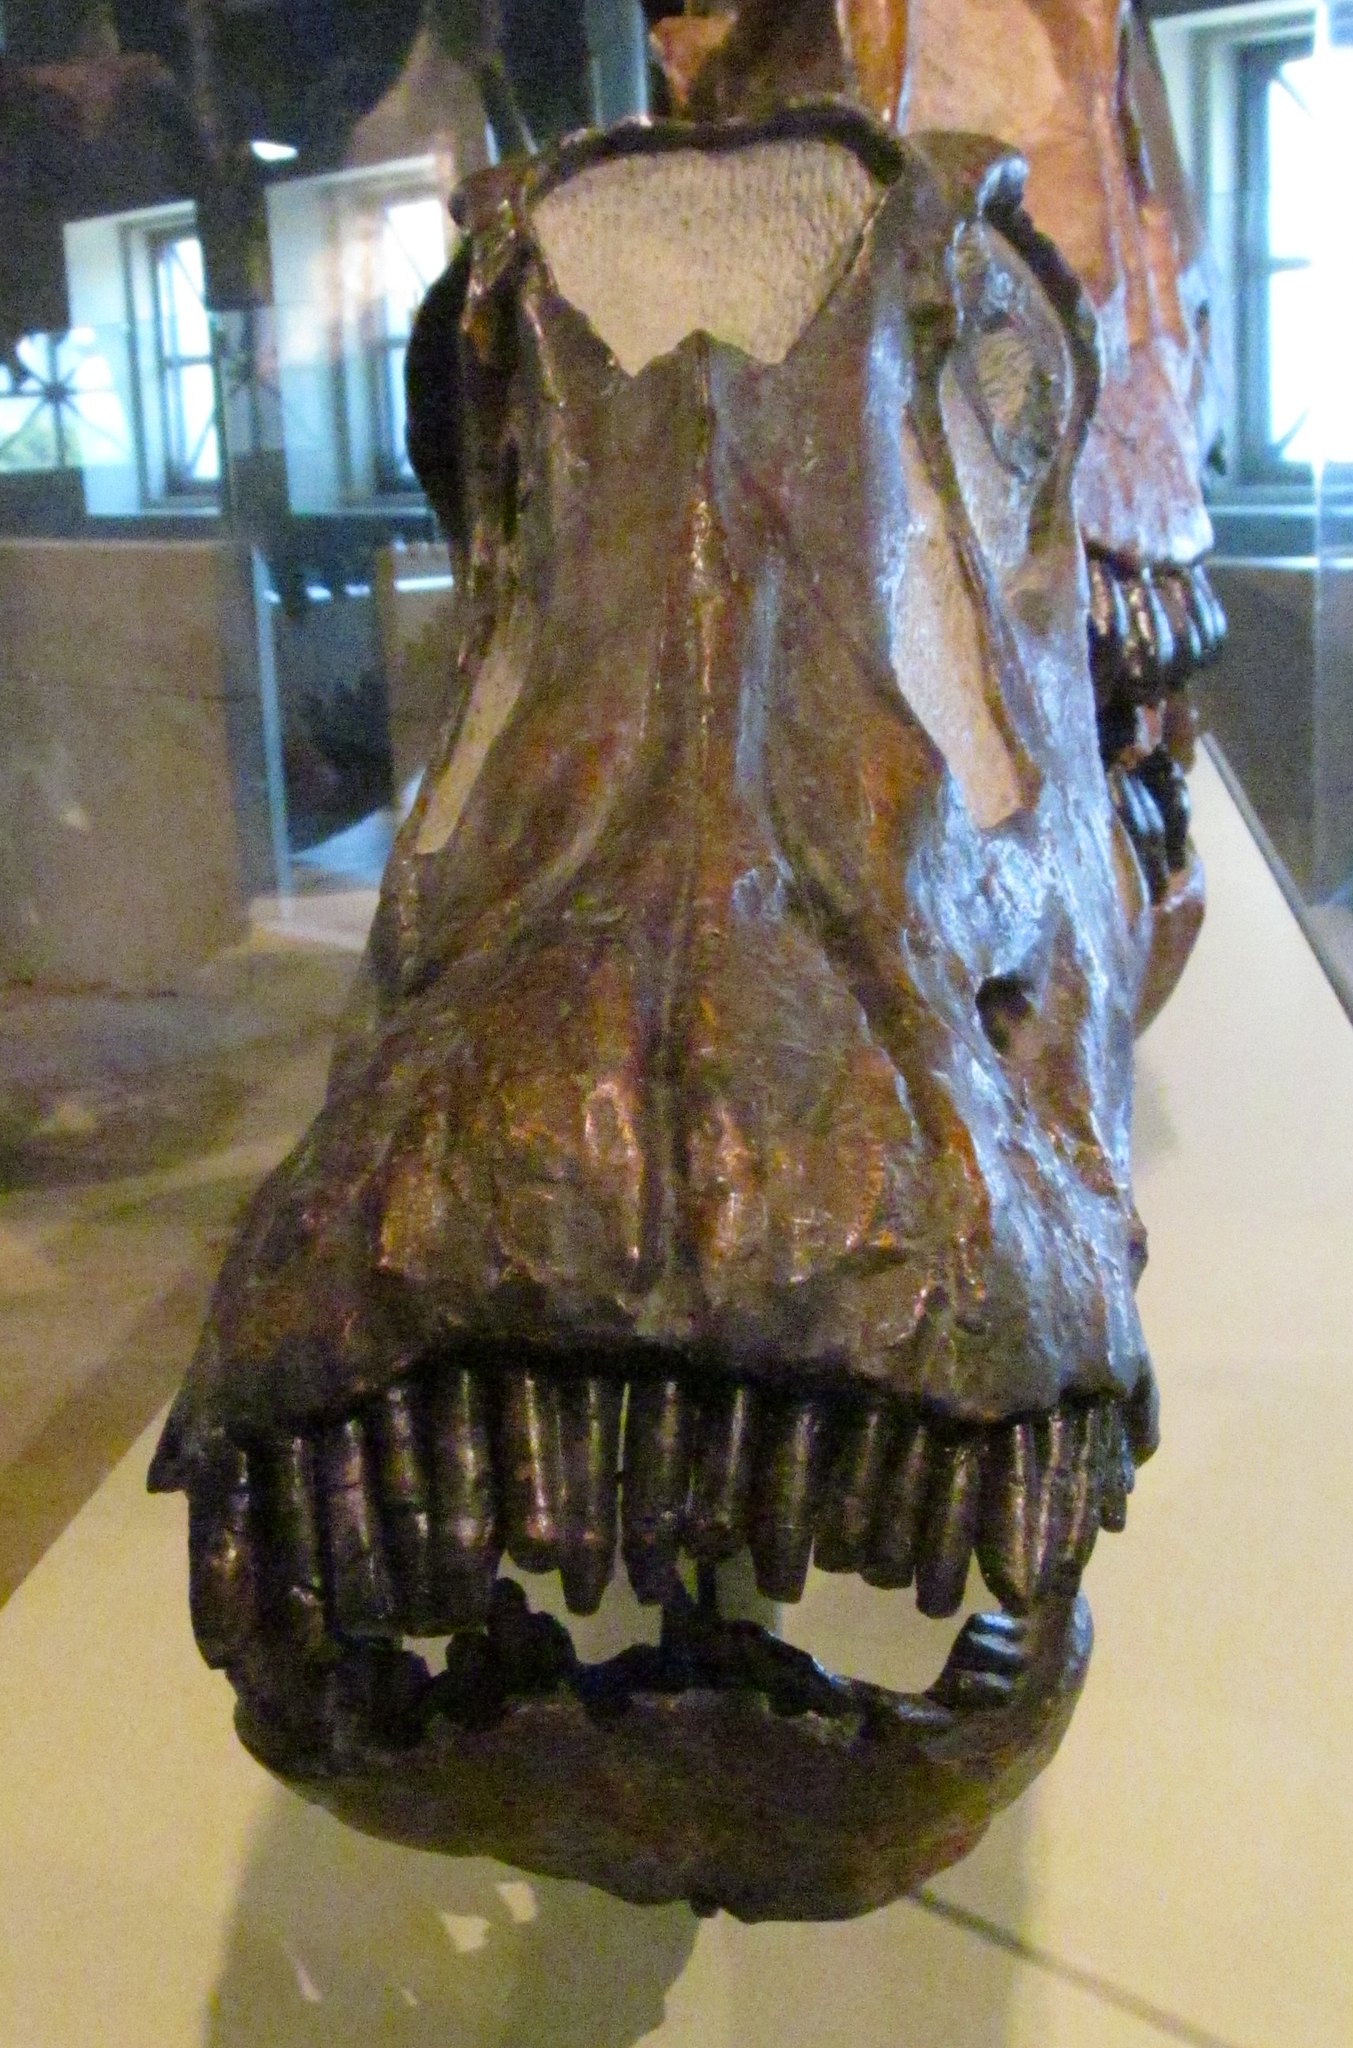
- Diplodocus teeth. Credit: Experiencing Life Trips/flickr/CC BY-NC-SA 2.0
- Camarasaurus tooth. Credit: Nick VanAcker
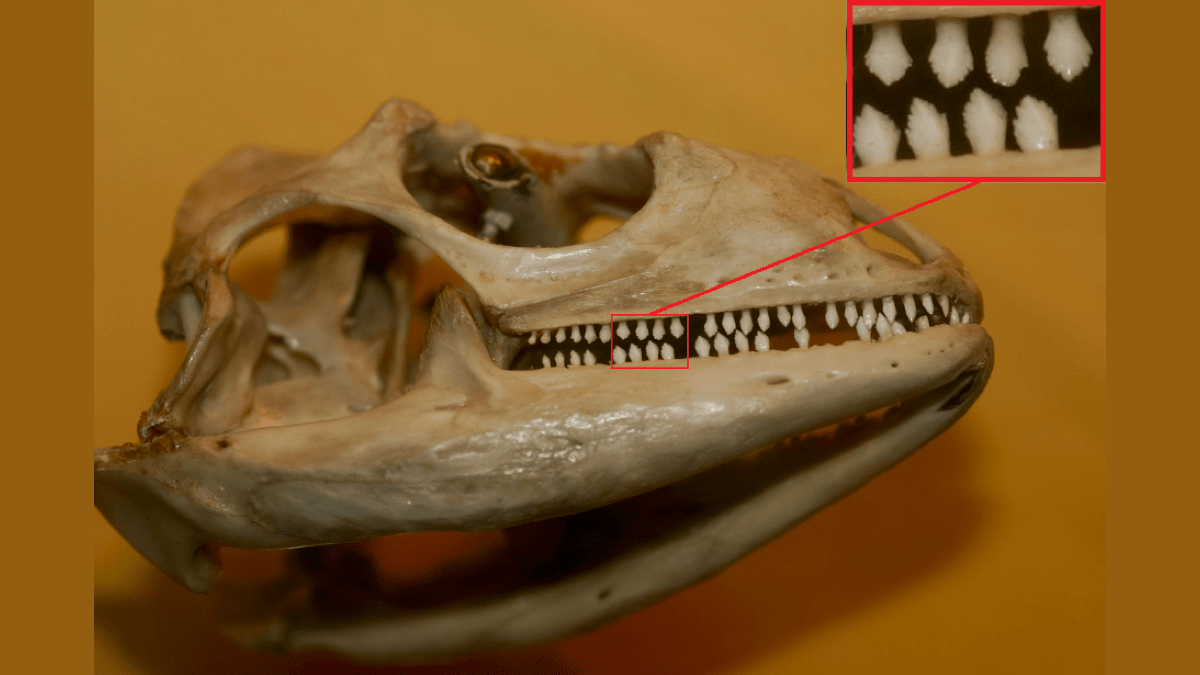
Paleontologists call Tooth Type A “peg-like” and Tooth Type B “spatulate” or “spoon-like.” Both types are highly specialized. They’re built for a very specific purpose: to eat plants!
These tooth types also appear in some modern animals. Watch the videos to see these teeth in action!
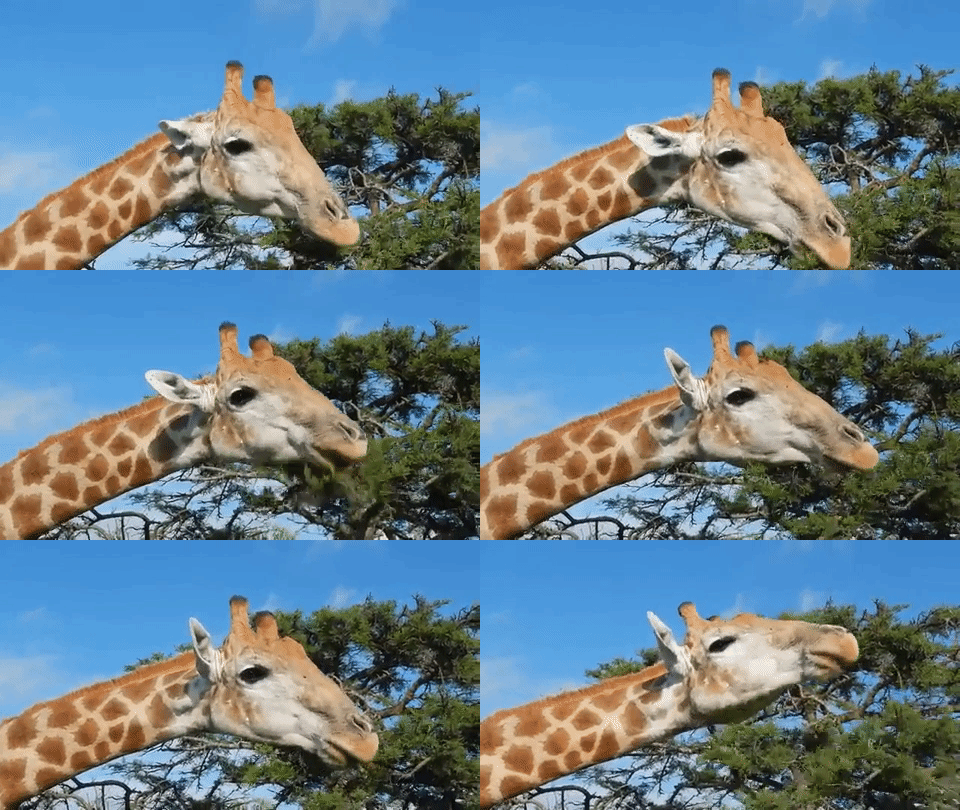
Peg-like Incisors
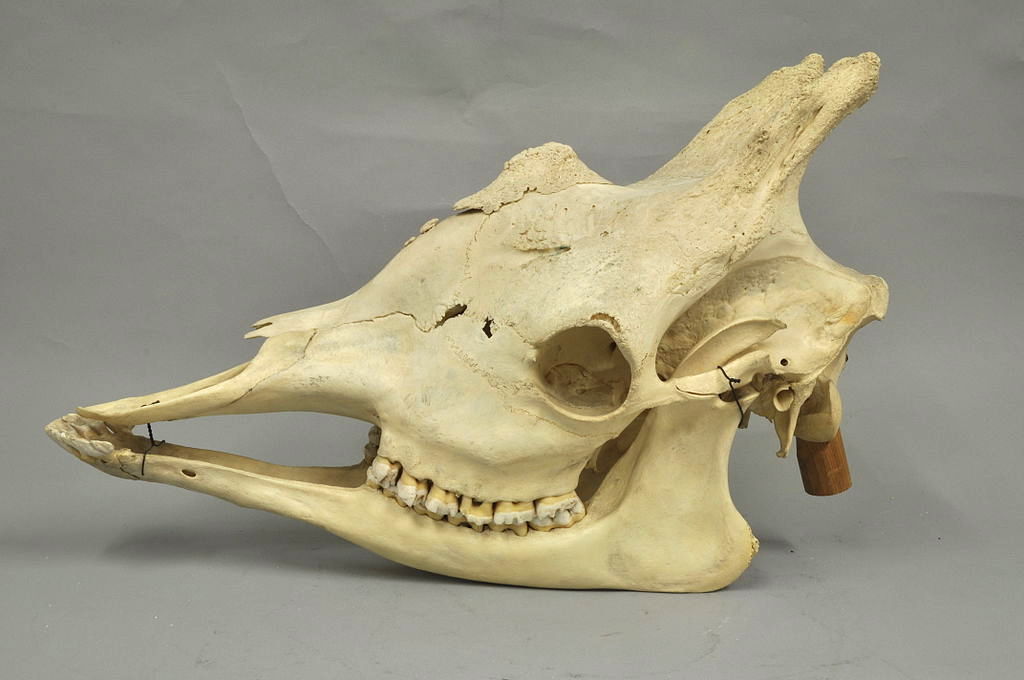
A giraffe’s front teeth are peg-shaped.
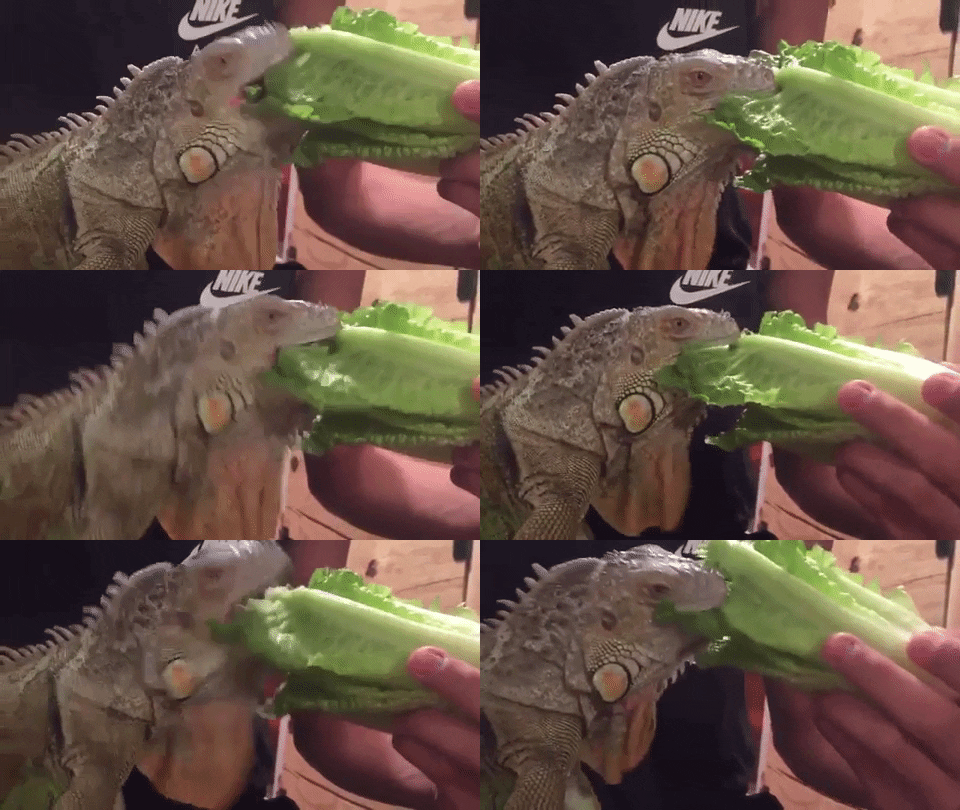
Spoon-like Teeth
All of an iguana’s teeth are spoon-shaped.
Examine the sauropod tooth diagrams again and consider the videos of herbivores above.
- What everyday object does each style of tooth remind you of?
- Which tooth would function best for scraping?
- Which tooth would function poorly for chewing?
- How do you think sauropods used these teeth to eat plants more efficiently?
- Peg-like teeth are good for raking leaves off of twigs. Spatulate (spoon-shaped) teeth are good for biting and chewing (but not great for chewing).
What Did Sauropods Eat?
As you can tell from their fossils, sauropods were MASSIVE. This may seem obvious, but it’s important to consider. If sauropods were so big, how did they maintain that size? How did they grow that big in the first place? Nutritionally, there are two ways to get big in the animal world. You need to either eat a smaller amount of very nutritious food, or eat a lot of a not-very nutritious food.
Based on their teeth, we know that sauropods ate plants, but which ones? And were they nutritious? There a few different ways to get that information.
One method is to study coprolites, or fossilized poop. By studying the elements left in a sauropod’s leftovers, paleontologists can sometimes tell what sort of plants they were eating, but this isn’t a perfect system. It can be hard to identify a specific plant by chemical analysis alone, and on top of that, it can be hard to tell if an individual coprolite even belonged to a sauropod in the first place!
Since we aren’t likely to find sauropod poop to study, we are going to look at teeth and digestive systems!
Activity 2: Research Modern Digestive Systems
Though we know how human digestive systems work, the digestive system of a sauropod would have looked slightly different, for one primary reason: Sauropods ate mostly plants! All plants contain a compound called cellulose in their cell walls that is very difficult to digest. Most herbivores use a mix of mechanical digestion, physically breaking down their food with chewing or grinding, and chemical digestion, using chemicals, like the acid in their stomachs, to break down the food further.
But stomach acid and chewing alone aren’t enough to digest cellulose. To help break down their food, all herbivores have a stage in their digestion called fermentation, where specialized gut bacteria break the cellulose into usable parts for an herbivore to absorb. There are two different types of this fermentation: foregut fermentation, which occurs before food enters the stomach, and hindgut fermentation, which occurs after (or behind) the stomach. Fermentation takes a long time, so the area it takes place intends to be big, which typically means the creature’s organs are either very large, very long, or very complex.
Foregut fermentation is good for animals that use mechanical digestion to break down food—like teeth in goats, for example. Some birds use an organ called a gizzard (or gastric mill) for mechanical digestion instead of teeth. They swallow small rocks (called gastroliths) and use them to grind food instead. The plants are broken down initially by this mechanical digestion, fermented, and then regurgitated and broken down again. In mammals, this process is sometimes called “chewing cud.”
Hindgut fermentation is good for animals that don’t use a type of mechanical digestion to break down their food. Once it passes the stomach, it stays in their digestive tract until it’s entirely broken down by the bacteria.
- Animals With Foregut Fermentation Have:
- Animals With Hindgut Fermentation Have:
- Teeth or gizzards that are great at breaking down food
- Teeth that roughly chop food so that animals can eat a greater amount of food at once
- Large/long/complex foregut (esophagus and stomach)
- Small/short/simple foregut (esophagus and stomach)
- Simple hindgut (intestines, colon, rectum)
- Large/long/complex hindgut (intestines, colon, rectum)
Though there is no modern equivalent of a sauropod today, we can examine modern herbivore digestive tracts for clues about what organs they may have had, and whether they used foregut or hindgut fermentation. The modern herbivores below all have something in common with sauropods, such as diet or size.
Domestic Cow
Bos taurus
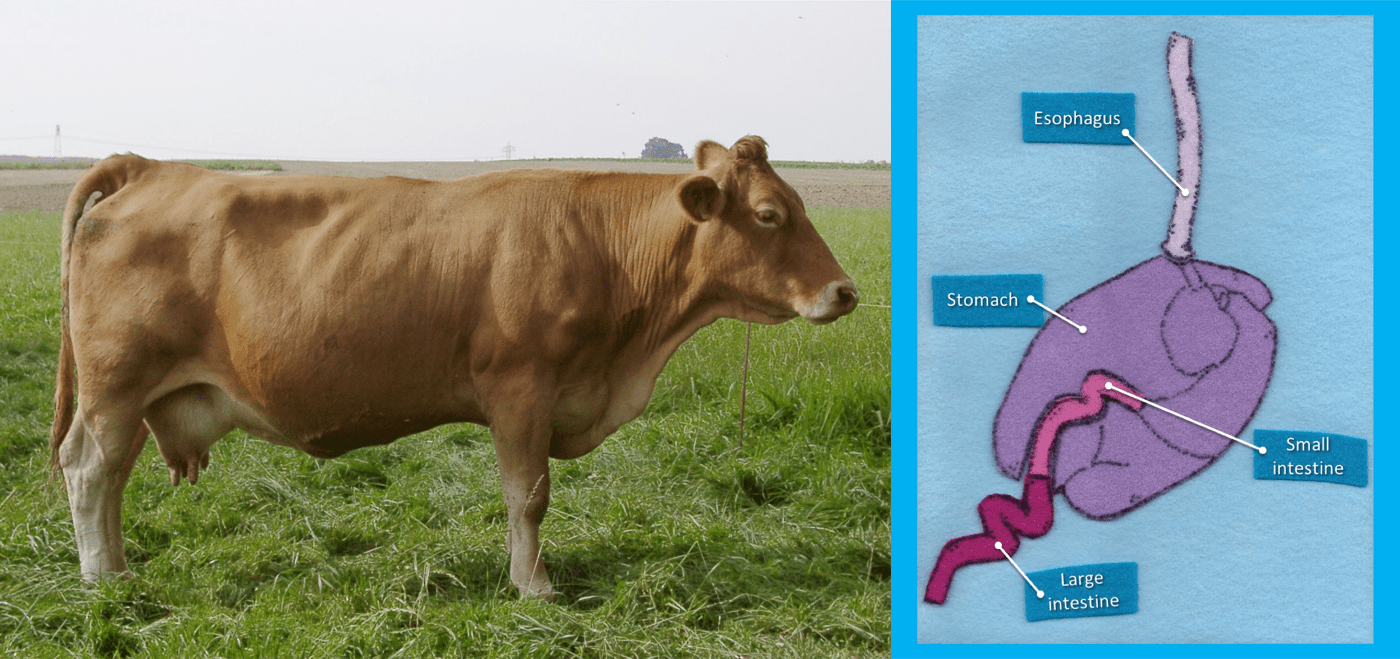
Because cows are used in agriculture, we have a good understanding of their digestive system–cows are often used as a model in digestion studies. Cows are mammals, not reptiles, but many of their nutritional needs are the same as a sauropod’s. Their teeth are good for grasping and chewing, and mainly eat grasses.
Domestic Horse
Equus ferus
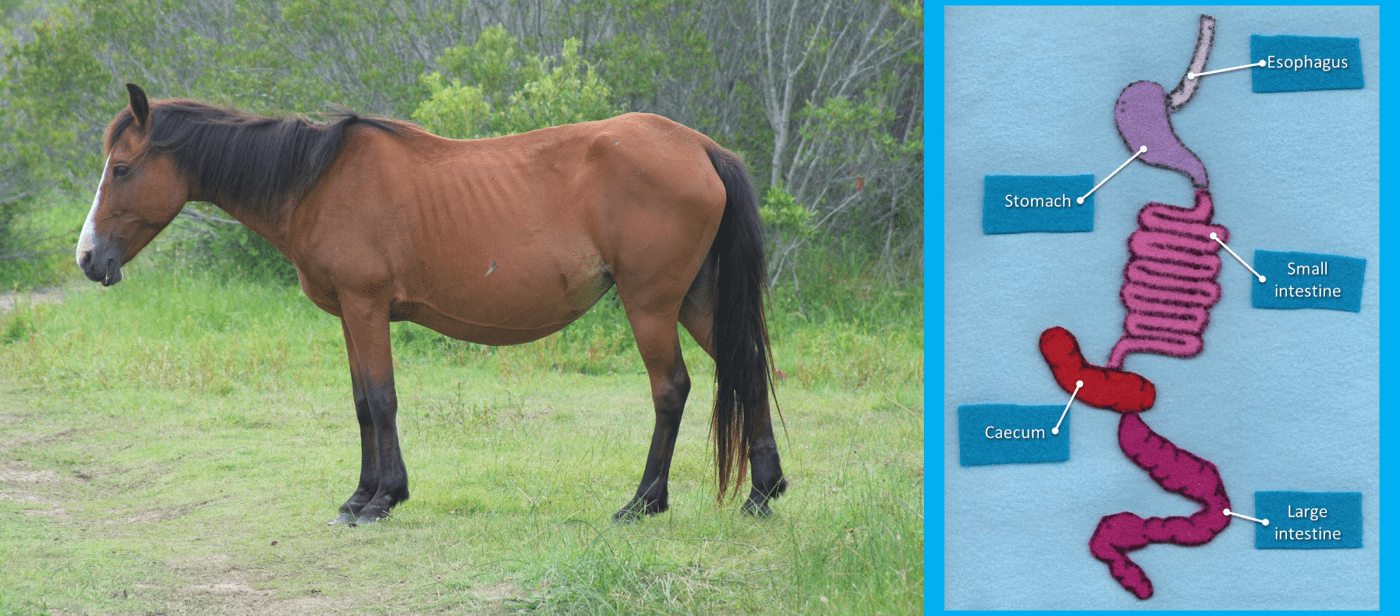
Horses are mammals, not reptiles, and have a different diet than sauropods. They do however have one thing in common with sauropods: They’re large herbivores that need to sustain themselves on vegetation alone. Their teeth are good for grasping and grinding, and they mainly eat grasses.
Asian Elephant
Elaphas maximus
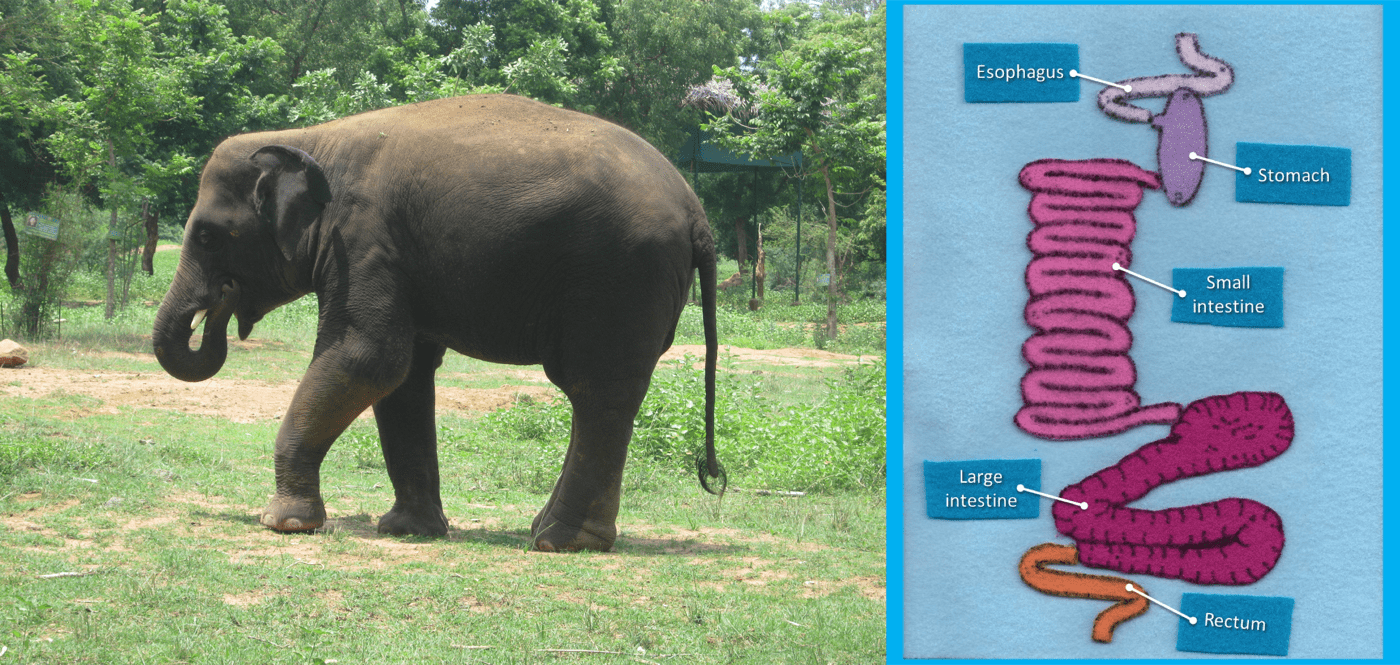
Elephants are mammals, not reptiles, and have a different diet than sauropods, but they’re large herbivores that need to sustain themselves on vegetation alone. Their teeth are good for roughly chopping food, and elephants have a varied diet which includes grasses, twigs, fruit, tree bark, and roots.
Hoatzin
Opisthocomus hoazin
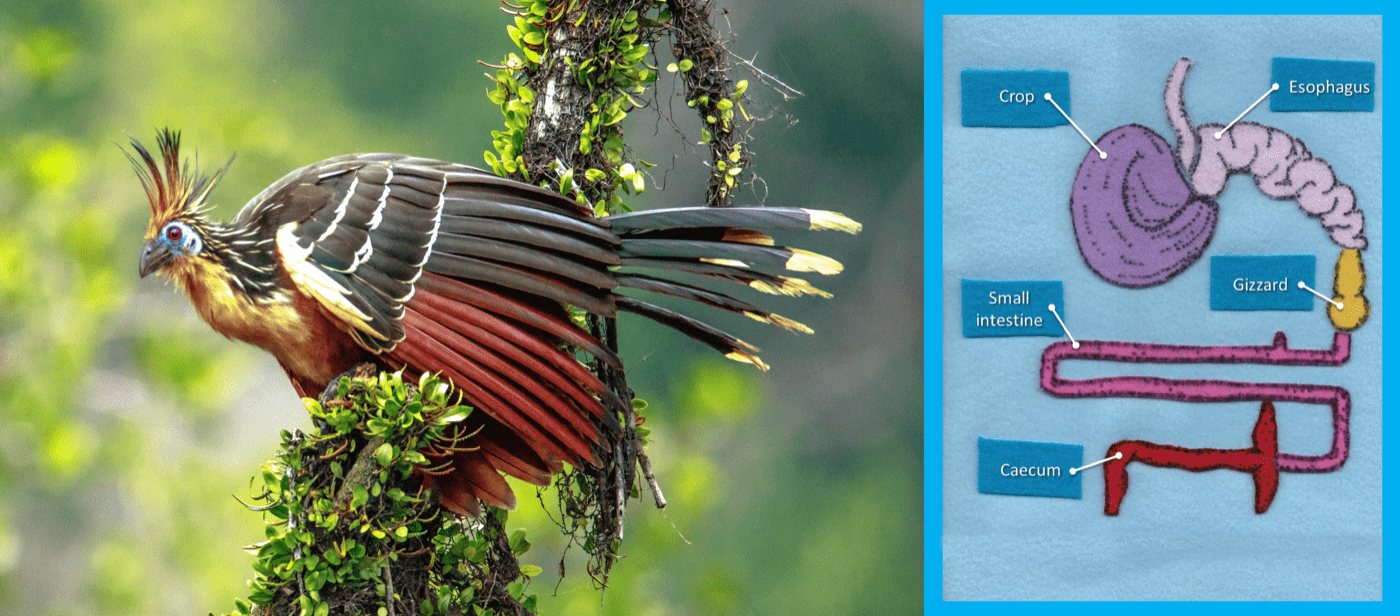
Hoatzins are herbivorous birds. Dinosaurs and birds are related, but birds evolved from a different branch of the dinosaurs, the theropods, rather than from sauropods. However, they may still have something in common: a gizzard! Paleontologists have discovered rocks that could be gastroliths alongside sauropod bones, but the rocks could also be from other, non-digestion related sources. Hoatzins use their gizzard instead of teeth, and mainly eat leaves.
Green Iguana
Iguana iguana
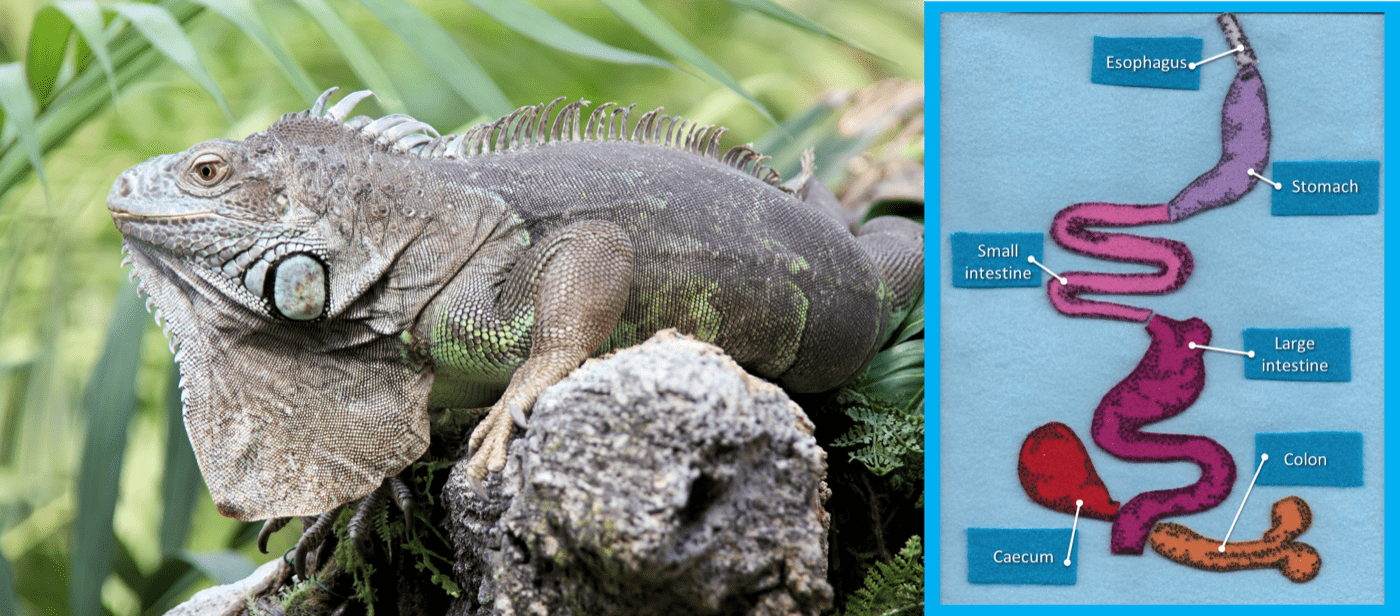
Iguanas are herbivorous reptiles, just like sauropods, and have similar spoon-like teeth, though iguanas are much smaller, and have a different diet.
Activity 3: Develop Your Hypothesis
Materials (for each student)
— Scissors
— Tape/Glue
— Sauropod Cutout
— Lab Instructions
Procedure
— Refer to sections 1 and 2 of your Paleontology Field Journal. Using the fossil and modern animal evidence, decide what organs to include in your sauropod digestive tract. Remember, your decisions should be backed by evidence. It may be helpful to decide first what sort of fermentation your sauropod might use and build a system from there
— After modeling your digestive system on the sauropod cutout, fill out the Lab Instructions Worksheet included in your Paleontology Field Journal
Activity 4: Testing And Iteration
Materials (for the whole class)
— Tarp (optional, but recommended)
Materials (per group)
— Completed Lab Instructions
— Completed Sauropod Cutout
— Gloves (optional, but recommended)
— Eye protection
— Various kitchen implements (wooden spoon, spaghetti spoon, etc.)
— 1 large plastic bowl
— ~4-6 tablespoons white vinegar
— ½ teaspoon baking soda
— 1 gallon-sized plastic bag
— 2 quart-sized plastic bags
— 1 sandwich bag
— 1 jar of any type (preferably glass)
— 1 pair of pantyhose
— Funnel (optional)
— Several small, smooth rocks or marbles
— Probiotic supplements (capsules work best—look for some that advertise being able to withstand stomach acid)
— Leafy greens (lettuce, kale, cabbage—whatever is on sale)
Procedure
Each group receives 1 quart-sized bag of greens, completes their sauropod cutout, then proceeds according to the lab instructions included in the Paleontology Field Journal
Lab Instructions
Step 1: Prep
Cover your work surface with garbage bags or a reusable tablecloth.
Step 2: Prep
Into a large plastic bowl, tear your leafy greens into small pieces, about the size of your pointer finger. You’ll need around 20 of these pieces.
Step 3: Teeth
A) Peg-like Teeth:
Using your spaghetti spoon or pencil, roughly poke holes into your leaves for two minutes. At the end of the two minutes, the leaves will look a little torn, and dark polka-dot like spots may appear on the leaves.
Tip: If using a spaghetti spoon, you can push the leaves against the side of your bowl with your spoon to break them down more easily.
B) Spoon-like Teeth:
Using your wooden spoon, roughly chop your leaves for two minutes. At the end of the two minutes, the leaves will look a little torn, and dark stripes may appear on them.
Question: What type of digestion is occurring here?
Step 4: Gastric Mill (optional)
Add your greens to a quart-sized plastic bag, and add up to five small rocks. Massage the bag in your hands, and use the rocks to grind the greens down further for one minute. Remove rocks, and transfer greens to stomach bag.
Question: What type of digestion is occurring here?
Step 5: Stomach
A) Simple Stomach:
Add greens to sandwich sized bag and add 4 tablespoons white vinegar. Gently massage and shake for one minute, being careful to keep the bag closed.
Question: What types of digestion are occurring here?
B) Chambered Stomach:
Add greens to sandwich sized bag and add 2 tbs. vinegar, 2 tbs. water, and one probiotic capsule. Seal the bag.
Once the bag is sealed, locate probiotic capsule in the bag, and gently crush it. Massage and shake for one minute, until you can no longer see remnants of the capsule among your leaves.
Once dissolved, carefully transfer your mixture back to either your large plastic bowl OR your gastric mill, if you chose to use it.
If you used a gastric mill, repeat steps 4 and 5 twice. If you did not use a gastric mill, repeat steps 3 and 5 twice. Each time step 5 occurs, add only 1 tbs. vinegar and one probiotic tablet.
After completing this cycle two times, funnel your mixture into a jar and seal it loosely. Write your name on your jar, today’s date, and put the jar in a place where it can be easily accessed and observed. Clean up your station, and let the jar rest at least overnight, preferably for 24 hours, before continuing to step 6.
Question: What sort of fermentation are you creating in your jar—hindgut or foregut?
Step 6: Small & Large Intestine
A) Short Intestines:
Add ½ tbs. of baking soda to your leaf mixture. This acts like bile in a normal digestive system, to neutralize the stomach acid. Be sure to leave a small opening in the mouth of your container, to allow gases to escape.
Over a bowl, transfer liquid from the stomach into the opening of a pair of pantyhose. Also over the bowl, squeeze the leaf mixture down the stocking, squeezing water out until the leaf material is dry and compacted in the toe.
B) Long Intestines:
Over a bowl, add ½ tbs. of baking soda to your leaf mixture. The baking soda acts like bile in a normal digestive system, neutralizing the stomach acid. Be sure to leave a small opening in the mouth of your container to allow gases to escape.
Funnel your mixture into a jar and seal it loosely. Write your name on your jar, today’s date, and put the jar in a place where it can be easily accessed and observed. Clean up your station, and let the jar rest, preferably for 48 hours, before continuing.
Question: What sort of fermentation are you creating in your jar—hindgut or foregut?
Stretch the opening of one pair of panty hose over the mouth of your jar. Over a bowl, empty contents of jar into the attached panty hose. Squeeze the leaf mixture down the stocking, squeezing water out until the leaf material is dry and compacted in the toe.
Step 7: Rectum & Anus
Once all water is squeezed from leaf material, roll the mouth of your stocking down toward the compacted leaves at the bottom of the toe and deposit your finished “sauropod feces” in a sandwich bag.
Congratulations! You made sauropod poop! After completing the lab, think about the process you went through. How closely do you think you replicated a sauropod digestive tract? Knowing what you know now, what changes would you make if you were to try this activity again?
Next Generation Science Standards
MS-LS4-1 Biological Evolution: Unity and Diversity
Analyze and interpret data for patterns in the fossil record that document the existence, diversity, extinction, and change of life forms throughout the history of life on Earth under the assumption that natural laws operate today as in the past.
MS-LS4-2 Biological Evolution: Unity and Diversity
Apply scientific ideas to construct an explanation for the anatomical similarities and differences among modern organisms and between modern and fossil organisms to infer evolutionary relationships.
Credits
Resource written by Nick VanAcker
Editing by Shirley Campbell, Brian Soash, Ariel Zych
Digital production by Daniel Peterschmidt
Educator's Toolbox
Meet the Writer
About Nick VanAcker
Nick VanAcker is a museum educator at the Michigan State University Museum, where he creates programs, events, exhibits, and activities related to biology, paleontology, and evolution. When not in museums or online, Nick considers himself an amateur naturalist, and can be found birding, herping, sketching mushrooms, pressing plants, pinning insects, or doing taxidermy.
